Showing posts with label Single Serving Recipes. Show all posts

Saturday, May 3, 2014

Brownie for One

I have tried several single serving brownie recipes, and most of them have hardly been worth eating.  This one, however, truly blew me away.  It was delicious!  The consistency was perfect, and the melted chocolate chips added just the right touch.  Oh so yum!

This makes a sizable brownie, so you may want to think about sharing it with a friend.  It would go absolutely wonderfully with a scoop of vanilla ice cream on top too!

So, before I start drooling all over my keyboard, let me just give you the recipe.  It comes from No. 2 Pencil, and she has got quite a few great single serving recipes that you can view here.

Brownie for One
From: No. 2 Pencil

Ingredients:
2 tablespoons butter (not margarine)
2 tablespoons sugar
1 tablespoon brown sugar, packed
1 egg yolk
1/4 cup flour
1 tablespoon unsweetened cocoa powder
2 tablespoons chocolate chips

Directions:
  1. In a mug or ramekin, melt the butter.
  2. Stir in the sugars.
  3. Add the egg yolk and stir.
  4. Lastly, add in the flour, cocoa powder, and chocolate chips, and stir until completely blended.
  5. Microwave for 45-60 seconds.  (Mine took the full minute.)
  6. Allow to cool slightly (if you can) before enjoying.
Ooh, this one is so yummy.  I hope you enjoy!  Happy weekend!

Wednesday, April 16, 2014

Peanut Butter Cookies for One


O. my. goodness.

Last night, I found myself at home alone (which is not normal for the evenings).  And as I was sitting around doing very little of anything, I suddenly needed some peanut butter cookies.  I love peanut butter cookies.  And they're never a cookie Thomas would choose to eat.  Sure, if I make them, he'll probably break down and have a few just because they're there.  But, usually, peanut butter cookies are all mine to eat.

So this recipe is absolutely perfect for me!  It's a single serving cookie recipe.  And, I've done some single serving desserts previously (check out the Recipe Index), but never a traditional cookie, baked-in-the-oven, recipe.


These cookies were perfect!  Seriously.  They tasted amazing and were so soft and moist that they just fell apart in my hands and melted in my mouth.  Depending on what size you make your cookies, you could get anywhere from 2 to 10 cookies from this recipe.  Yes, it's a "single serving" recipe, but if you know what's good for you, you probably shouldn't eat all of the cookies in one sitting.  (Apparently I don't know what's good for me.)  But, oh, it was worth it!

This recipe comes straight from No. 2 Pencil, and she has several single serving recipes of all different varieties.  And if you're into these types of recipes, you should definitely check out the blog.  I have yet to try one of her single serving desserts that I did not like!  You go, girl!


Peanut Butter Cookies for One
From: No. 2 Pencil
Makes: 2-10 cookies depending on size

Ingredients:
2 tablespoons butter
3 tablespoons brown sugar, packed
Pinch of salt
1/4 teaspoon vanilla extract
2 tablespoons peanut butter
1 egg yolk
1/4 teaspoon baking soda
1/4 cup + 1 tablespoon all-purpose flour

Directions:
  1. Preheat oven to 350 degrees, and line a baking sheet with parchment paper.
  2. In a small bowl, microwave butter until softened (a little melted is fine).
  3. Stir in brown sugar, salt, and vanilla.
  4. Add peanut butter, and stir until combined.
  5. Separate the egg white and yolk, and stir in only the yolk.
  6. Add the baking soda and flour, and stir one final time.
  7. Using your hands, roll the dough into as many cookies as you like and place them on the parchment-lined baking sheet.  Flatten slightly with a fork.
  8. Bake for 8-10 minutes, until the edges start to turn golden brown.
  9. Remove cookies to a cooling rack to cool.
  10. Enjoy with a glass of milk for dipping!  Yummy!
Ooh, I could make these again right now.  But, since it's ten in the morning, I guess I will refrain!

Saturday, March 29, 2014

Healthy Berry Banana Smoothie

Ok, so this smoothie is so good, even my cat is addicted!  Lol.  I should inform you that Lolo loves yogurt.  Every time I eat it, she needs some.  So, when I make this smoothie, she really needs it.  (Please excuse my "unedited" morning face and pj's!)


The great thing about smoothies is that you can easily alter them to match your tastes.  Here are the ingredients that I used, but keep in mind that you can very easily change things out.  One suggestion I would make is to choose a yogurt that you like the flavor of.  Yogurt is a big part of the smoothie, so a flavored yogurt can go a long way in changing the taste.  I really love Publix Wild Berry Crumb Cake yogurt because it has a bit of berry flavor and some spice to it.  Yum!


Healthy Berry Banana Smoothie
Makes: one 16ish ounce smoothie

Ingredients:
1 cup frozen berries (I used unsweetened strawberries)
1/2 - 1 frozen banana (depending on how strong of a banana flavor you like)
6 ounces yogurt (I love Publix Fat Free Light Wild Berry Crumb Cake)
1/2 cup your choice of milk (more if it's too thick)
1 tablespoon honey
Small handful of almonds

Directions:
Add the ingredients to the blender in the order listed.  Then blend well until smooth.  Enjoy!

Friday, February 28, 2014

Deep Dish Cinnamon Chip Cookie for One

I have a confession to make.  Recently I have fallen into a pit.  A "I can't wait until after dinner to have a dessert; I must have a dessert now" pit.  And I fall into this pit just about every day around 2pm.  It's terrible.  I really need to kick this middle-of-the-day super-unhealthy-snack thing.  But it's just so difficult.  I'm home... There's a well equipped kitchen right there... Heck, there's a pantry with canned icing and vanilla wafers right there for all I care!  I'll take anything!

But I have really, really fallen in love with this single serving chocolate chip cookie that I found on No. 2 Pencil via Pinterest.  It's super easy to make and ready in about 5 minutes.  And soooo soooooooo good!  Especially because I really don't mind eating raw egg every once in a while, so I don't cookie my cookie quite all the way through and half of it is basically really warm melty cookie dough.  Yum... I'm about to go make myself another one just talking about it.


But today, I decided to try something a little different.  We all know how much I love cinnamon, and while I was stirring up this cookie today, I ran across a mostly empty bag of cinnamon chips that has been sitting in my pantry for a while now.  And I thought... Ooh, maybe I could make a cinnamon chip cookie!


...So, I did!  I tweaked the chocolate chip cookie recipe a little bit to make it mesh better with the cinnamon chips, tossed it in the microwave.  And could barely make it through the whole 5 photos I took before chowing down on it.  And boy was it yummy!  There is nothing quite like a hot gooey chocolate chip cookie, but this one was close.  The extra sugar, cinnamon, and cinnamon chips were delicious!  I will definitely be making this puppy again.


Deep Dish Cinnamon Chip Cookie for One
Adapted from: No. 2 Pencil

Ingredients:
1 tablespoon butter, melted (butter, not margarine)
1 tablespoon granulated sugar
1 1/2 tablespoons brown sugar
Splash of vanilla
1 egg yolk
1/4 teaspoon cinnamon
Scant 1/4 cup flour
2 tablespoons cinnamon chips

Directions:
  1. Melt butter in a ramekin (or mug).
  2. Stir in the sugars and vanilla.
  3. Add the egg yolk; stir.
  4. Add the flour and cinnamon; mix until fully incorporated.
  5. Add the cinnamon chips and mix together.
  6. Microwave for 50 seconds to 1 minute.  (Adjust time for your microwave, but don't cook it too long or it will become tough.)
  7. Let cool for a few minutes before digging in.  This goes really well with a scoop of ice cream too!
Enjoy!

Tuesday, February 18, 2014

Crepes from Heaven


So, I bought some fresh strawberries at the store yesterday.  And as I was laying in bed last night, I decided just what to do with them... Strawberries and Cream Crepes!

BEST.  IDEA.  EVER.

These crepes were absolutely amazing!  Seriously, crepes from heaven is not at all an exaggeration!  I could have kept eating these until it killed me.  That's how amazing they were!  I definitely should not have eaten all four.  I would highly suggest sharing these with a friend unless you want to follow them up with a major workout (which I did, good for me, lol).
You should go make them... Now... Whatever time it is that you're reading this!  I had them for breakfast, but they would be equally as perfect for dessert!

So I used my Crepes for One recipe.  Then I whipped (literally) up some cream cheese cream to put inside of them.  And with the tart, fresh berries.  YUM!
Cream Cheese Whipped Cream (for one)
This made the perfect amount of cream for the four crepes that the Crepes for One recipe makes.  *Note: the crepe in the photo was filled a little too full, so I filled the other ones a bit less to compensate.

2 ounces cream cheese, softened
2 tablespoons heavy whipping cream
2 tablespoons powdered sugar
  1. In a small bowl, beat the cream cheese with an electric mixer until smooth.
  2. Add whipping cream and powdered sugar.  Beat until combined and slightly stiffened.
  3. Set in refrigerator while you cook the crepes.  (Crepes for One Recipe)
  4. Spoon two dollops into the center of each crepe, then top with fresh strawberries.
  5. Roll the crepes up and enjoy heaven!
 I am not even kidding.  I would make these every single day of the week if they wouldn't make me fat!  Please go make them so that someone else will know what heaven tastes like with me!

Friday, January 31, 2014

Baked Stuffed Apples

Today's treat is an easy, delicious dessert that won't completely kill your healthy habits.  At heart, it's a warmed up apple, but when you dress it up the right way, it can be a fantastic sweet-tooth craving buster!
It's... Baked Stuffed Apples!  Now you know I just love baking with apples.  And this is a simple and perfect apple dessert!  Warm and soft, spicy and sweet.  You can't go wrong with this little snack!

All you have to do is core out an apple...
Fill it with some delicious oats, nuts, raisins, and spices...
And pop it into the oven until it's golden and crispy... And dig in!
These apples are so easy to make, and you can change up all the ingredients to match your cravings!

Baked Stuffed Apples
Makes: 1 medium apple

Ingredients:
1 apple (I've used fuji and gala and like them both.)
1/2 tablespoon butter/margarine, softened or melted
1/2 tablespoon honey
1/2 tablespoon brown sugar
2 tablespoons oats
1/8 teaspoon cinnamon
Sprinkle of nutmeg
Optional: nuts, raisins, etc.  (I like sliced almonds and raisins.)
*Note: 1/2 tablespoon equals 1 1/2 teaspoons.

Directions:
  1. Preheat the oven to 350 degrees.
  2. Combine all of the ingredients (except the apple) in a small bowl.  Take a taste and adjust amounts as you like.
  3. Core out the apple without cutting the bottom out.  I like to make a pretty big hole in my apple so it will hold as much filling as possible.  I do this by switching back and forth between a knife and a spoon to get the core out little by little.
  4. Fill the apple with the filling mixture.  Place in a ramekin and place in the oven.  (I like to use a ramekin so that the apple has the least chance of falling over.  But you could put it on a baking sheet, etc. also.)
  5. Bake for about25 minutes, or until the apple is soft and the filling is slightly browned on top.
  6. Let it cool for about 5 minutes before eating.  I like to cut it in half and cut off the bottom so I don't eat the stem-y part.
If you're feeling really indulgent, you could try it with a scoop of vanilla ice cream and/or some caramel sauce on top!  Yummy!

Enjoy!!!

Monday, January 20, 2014

Classic Crème Brûlée {Lundi Little Lovelies}

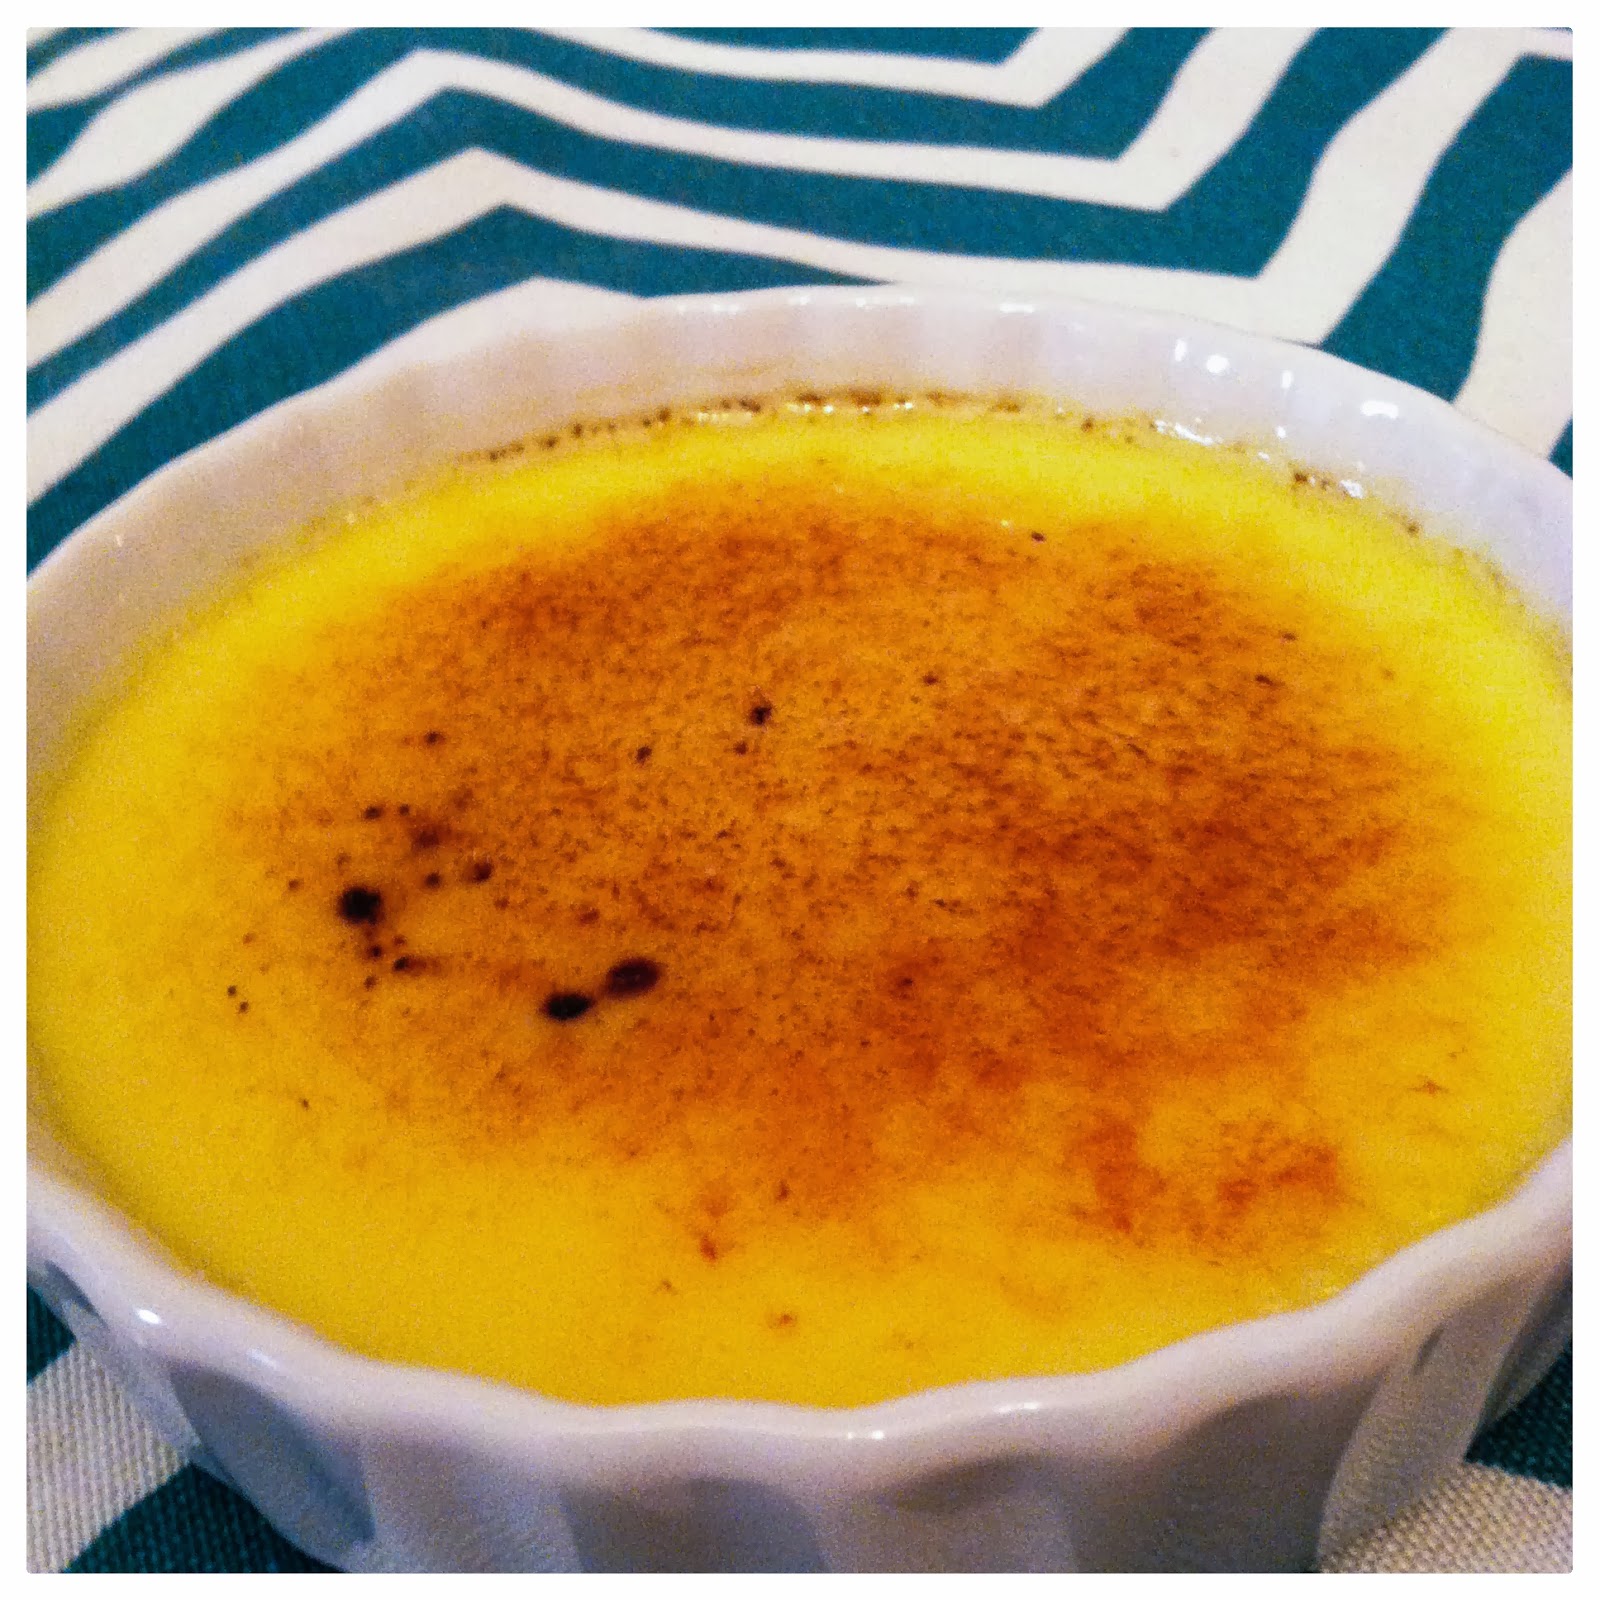
Since I got my crème brûlée tools for Christmas, it has been almost the only dessert I've made.  It is divine!  Thomas has actually licked the bowl several times after eating it.  It's perfect for us because the recipes are super easy to create just two servings.  But it's also just as easy to make more servings at one time!

I've tried several different variations so far: classic (vanilla), chocolate, and banana.  I'm sure I will also continue to try new flavors, but the classic creme brulee is so delicious that we will definitely keep coming back to it!  The other night, when I made this batch, we ate it with some delicious fresh strawberries that I had.  Yum!
This is classic (vanilla) crème brûlée.  It's super creamy and delicious.  And don't you just love the crunchy torched-sugar top.  (Besides the part where you get to eat it, Thomas' favorite part is torching the top.  He just can't stop playing with the torch I got for Christmas.)
Though it takes a little time with all of the steps, crème brûlée is actually incredibly easy to make.  As long as you follow the steps, I'd reckon that it's pretty difficult to mess up.  I hope you enjoy this decadent dessert!

*Note: I use crème brûlée/tarlette ramekins that are about 4 1/2 inches in diameter and 1 inch tall.  You could also use taller/skinnier ramekins if you like.

Classic Crème Brûlée

Serves: 2-4 (depending on ramekin size; I make 2 servings)
Adapted from: "Professional Cooking Torch Recipes" (the recipe book that came with my torch)

Ingredients:
1 cup heavy whipping cream
2 tablespoons granulated sugar
2 large or extra large egg yolks
1/2 teaspoon vanilla extract
More granulated sugar for sprinkling

Directions:
  1. Preheat oven to 300 degrees. Boil some water (I need about 3-4 cups).
  2. In a saucepan, combine the heavy cream and 2 tablespoons of sugar.  Cook over medium-high heat for about 5-6 minutes, until small bubbles form around the edges of the pan.  Stir occasionally.
  3. While the cream is cooking, combine the egg yolks and vanilla in a medium-sized bowl.  Whisk until light and smooth.
  4. When the cream is finished, slowly add it to the egg yolk mixture while whisking.  Do not add too much too quickly; you don't want to cook the eggs.  Beat continuously until well blended.
  5. Strain mixture through a mesh strainer into another bowl or a glass measuring cup (for easy pouring).  (This removes those bright white parts of the egg that usually stick to the yolk.)
  6. Pour the strained mixture into your ramekins.
  7. Arrange the ramekins in a baking pan.
  8. **Do these next steps in the order that you are most comfortable with.  Pour the boiling water into the baking pan to reach about halfway up the sides of the ramekins.  Then place it all in the oven.
  9. Cover loosely with foil.
  10. Bake for 25-40 minutes, or until custard is just set (the edges look set when you jiggle the pan, but the centers may be a little more liquid.)  If you make 4 servings, it will take about 25 minutes.  If you make 2 larger servings like I do, it will take more like 40 minutes.  Just keep checking about every 5 minutes until the custard jiggles more like jello than liquid.
  11. Remove everything from the oven, and then remove the ramekins from the water bath VERY CAREFULLY.  Chill the ramekins for about 3 hours.
  12. When ready to eat, sprinkle granulated sugar over the top of each ramekin, then torch it with a cooking torch or blow torch.  Continously move the flame over the top of the custard until it reaches the desired color.  It should melt and bubble up a bit.
  13. Serve immediately.
Ooh!  Just thinking about it makes me want to make it again today!  Yum!  I hope you love it as much as Thomas does!

Friday, September 13, 2013

Cinnamon Sugar Puppy Chow

Ok... So I've been a little busy this week.  However, here is the manna-from-heaven puppy chow recipe that I promised you!  Now, I know that one of the things that makes puppy chow so good is chocolate.  And boy, do I love chocolate!  But, this recipe doesn't have any chocolate in it.  It's got something that's just as good... cinnamon!  Yum!

So if you like cinnamon at all, there's a really good chance you'll like this version of an old classic.  I've also adapted all of my recent puppy chow recipes to where they don't make ninety millions cups of puppy chow.  So here's the recipe for a smaller portion.
Cinnamon Sugar Puppy Chow
Very Slightly Adapted from Fabtastic Eats
Makes about 1 cup

Ingredients:
1 tablespoon butter
1/4 cup cinnamon chips (The ones I've bought are Hershey's brand.  You find them in the baking aisle with the chocolate chips.)
1 cup Chex cereal
2+ tablespoons powdered sugar
1/8 teaspoon granulated sugar
1/8 teaspoon cinnamon

Directions:
  1. Melt the cinnamon chips and butter in the microwave.  I recommend 15 second intervals, stirring in between.  The cinnamon chips take a little vigorous stirring to lose their form.  Allow mixture to cool for a few minutes.
  2. Combine your cinnamon, sugar, and powdered sugar in a quart sized bag.  Shake them up a bit to combine.
  3. Stir the Chex into the melted cinnamon chip mixture until they are pretty evenly coated.
  4. Add the Chex to the quart-sized bag and shake well.  You can always add more powdered sugar if you like your puppy chow really sweet, as I do.
  5. Enjoy!
Oh, yum!  I really want to go make some more, but I've got to eat dinner instead before heading off to the high school football game tonight.  There's nothing quite as weird as eating dinner at 3:30 in the afternoon!

Friday, August 23, 2013

The End of a Weird Week

So, it's Friday.  And technically, since I'm not working right now, that shouldn't make much of a difference, but today it does.  Thomas has been in Tampa all week for work, and he comes home tonight.  And man-oh-man I cannot wait!  He was gone all last week too, which is a lot of time apart for us.  We're basically inseparable, so even a few days apart feels like a lifetime.
Though I didn't blog the last two days, I was still diligent in trying out single serving recipes, so I still have a few I'd like to share.  This particular one doesn't look like anything special.  Mainly because when I got it out of the microwave, it and the mug were hotter-than-all-get-out, so I had to scoop it out into a ramekin so it would cool off enough to eat.

And though this isn't a traditional peanut butter cookie (one of my faves), it definitely satisfied my craving for one!
 
Peanut Butter Mug Cake
Adapted from: My Happy Place
(Her original recipe makes either two cakes or one twice this size, so I just cut everything in half.  Plus, I needed the other half of an egg for another recipe.)

Ingredients:
2 tablespoons flour
2 tablespoons sugar
1/8 teaspoon baking soda
1/2 egg (lightly scramble it in a bowl and then pour half in with your other ingredients)
1 1/2 tablespoons peanut butter
1 1/2 tablespoons milk
1 1/2 tablespoons oil

Directions:
  1. Mix everything together in a mug.
  2. Microwave for about 60 seconds.  (If your microwave is very powerful, you might want to start with less time.)
  3. If it is not done, microwave at 20 second intervals until done.  Don't microwave it for too long though, or it will become rubbery.
  4. Watch out!  It will be boiling-lava-hot!  So be careful when eating!

Well, I'm off to work on sewing flags for color guard and continue my Netflix marathon.  Happy Friday!

Tuesday, August 20, 2013

Let's Pretend Like It's Winter

Yeah... so.... most of you probably can't believe those words just came out of my mouth, or rather my keyboard.  I really don't love winter.  Every time someone starts up a conversation about winter, it always includes something to the effect of "Oh, but the snow is so pretty!"  Yes, I agree, the snow is pretty.  But for every pretty day of snow, you have at least five days of cold, windy, grey sky, dreary days.  Basically, I just hate being that cold.

But anyway, it's the middle of August, and it's about as hot as it ever gets during the year, and yet I had a small winter moment this morning.  I was jonesing for a hot, delicious drink, so I decided to try out a recipe that I found on Pinterest for "Hot Vanilla Milk".  Because, I love hot chocolate, so why wouldn't I like hot vanilla milk?!  And I was just intensely curious as to what it would taste like.

It was so yummy!  Warm, sweet, smooth.  Just overall yum!  I didn't really change anything from the original recipe that I found, except that I wanted just one cup of it rather than the four that the recipe made, so I just scaled it down.

Hot Vanilla Milk
From Laugh With Us Blog
Makes 1 cup

Ingredients:
1 cup milk
4 teaspoons sugar
1/2 teaspoon vanilla

Directions:
  1. Mix all ingredients in a mug.
  2. Microwave for 60-90 seconds.  Stir well to make sure the sugar is dissolved.
  3. Top with marshmallows if desired.
 Oh!  It was soooooo good!  Next time I'm going to try it with a sugar substitute for less calories.

In all seriousness, I'm really glad it's not winter, but that doesn't mean I can't enjoy my few favorite parts of winter!

Monday, August 19, 2013

It's Definitely the Little Things {Lundi Little Lovelies}

Today is a wonderful day so far!  And it's because of small blessings that sometimes would be easy to miss if we weren't looking!  I've found that the key to finding contentment is in appreciating and thanking God for the little things he blesses us with!

So here are some little lovelies from today:
  • I got to meet the hubby for lunch at Panera this afternoon!  And this is like so many little lovelies wrapped up together with a nice, pretty bow!  I love getting to meet up in the middle of the week (and usually a workday) for lunch.  I don't know what it is, but it just makes the whole day better!  It was such a blessing that Thomas had the time to take a break; I didn't have anywhere I had to be; we have the money to get to eat out when we want; Thomas chose Panera!  So many little things that make me happy!
  • Piggy-backing on that, when I got to lunch, Thomas informed me that he also got to work from home the rest of the day!  Yay!  So he's sitting next to me now, and even though he's working, we still get to be together.
  • I made some yummy crepes for breakfast this morning!  The recipe for one serving of crepes is shown below!  I'm still going to be cooking for one a lot this week, so I think I'll be continuing the single serving recipes.
  • Church volleyball starts tonight.  This one is only half of a little lovely, because only half of me is excited about it.  The other half would rather chicken out and stay home.  The last time I played volleyball was in high school.  Eek!  But it was so fun.  Volleyball makes me reminisce a lot.  Thomas and I started dating the summer before our senior year, and I started hanging out with his friends... A LOT.  And man, I just love those guys.  Thomas had the best friends, and hanging out with them was ALWAYS a good time.  But anyway, back to how this relates to volleyball; one year at youth camp, we had this huge volleyball tournament, and I was on a team with Thomas and his friends.  We played like 8 games in a row without a break and were on fire!  It was awesome.  We didn't win the tournament because we lost the very last game we played (I blame it on the fact that we played a zillion games in a row, and the winning team only played twice total.)  But, it just reminds me of all the good memories I have from hanging out with his friends.
Anyway, now I'm off in lala land.  Let me bring it back and give you this yummy crepes recipe.
Customizable Crepes for One
Minimally Adapted from Like Mother, Like Daughter
Serving Size: Makes 4 crepes about 6-7" in diameter

Ingredients:
1/3 cup flour
1/6 cup milk
1/6 cup water
1 egg
2/3 tablespoon melted butter
1/8 teaspoon salt
2 teaspoons granulated sugar

Directions:
  1. Combine all the ingredients in a small bowl and mix until well-combined.  (I used my hand mixer.)
  2. Heat a small skillet on medium heat and spray with cooking spray.  ( I used my 8" skillet.)
  3. Pour batter into the hot skillet by the scant 1/4 cup.
  4. Swirl batter around a little to thin it out.  Cook about 1 minute.
  5. Flip the crepe over and cook the other side for 30 seconds.
  6. Place on a plate covered by a paper towel to keep warm until all four crepes are ready to serve.
  7. Fill with your desired toppings and enjoy!
 
 I filled my crepes with half of a fresh peach chopped up and mixed with some brown sugar and cinnamon.  (I heated the mixture up in the microwave to make it all warm and gooey first.)  Then I topped them with powdered sugar and honey!  But, you can fill and top crepes with pretty much anything you want: nutella, peanut butter, fruit, whipped cream, the list goes on and on!

Here's to the little lovelies that bring me closer to contentment!

Friday, August 16, 2013

Cinnamon Sugar Scones for One (Kind Of)

So, this one isn't exactly a single serving recipe either.  I scaled the original recipe down to make three small scones.  So, technically, you'll have to eat these for breakfast for a few days... oh darn!
Honestly, I was amazed at how delicious these scones were.  They were so light and flaky.  Wow!  I could have eaten all three in one sitting, but I managed, with some difficulty, to make them last two days.  They were amazing, and the glaze on top was the perfect finish.  I will definitely be making these again... soon!
Cinnamon Sugar Scones
Adapted from: Money Saving Mom
Scaled down to make 3 small scones (see original website for full yield version)

Ingredients:
1/2 cup flour
1/2 teaspoon baking powder
1/8 teaspoon baking soda
1/8 teaspoon salt
1/8 teaspoon cinnamon
2 tablespoons cold butter
1 teaspoon yogurt (I used fat free vanilla, but plain would work too.)
scant 1 tablespoon honey
scant 1/8 cup milk (if in doubt, start with too little; you can always add more if it's not enough)

Directions:
  1. Preheat oven to 400 degrees.
  2. Combine dry ingredients in a medium sized bowl.
  3. Cut in butter using a pastry blender or a fork until crumbly.
  4. Combine the wet ingredients in a small bowl and then add them to the dry ingredients.  Use your hands to mix the dough until it forms a ball.
  5. Divide the dough into three sections and pat out until they are about 1/2 inch thick, and place on a lightly greased cookie sheet.
  6. Brush the tops with a very thin layer of milk.  Combine 1/2 tablespoon sugar and 1/8 teaspoon cinnamon and sprinkle over scones.
  7. Bake at 400 degrees for 10-12 minutes.
  8. While the scones are baking, stir together the following ingredients to make the glaze: 1/4 cup powdered sugar, scant 1 teaspoon milk, 1/8 teaspoon vanilla. 
  9. While the scones are still warm, drizzle the glaze over the top.  (When I make these again, I probably won't use the entire batch of glaze just so it isn't overpowering.)
  10. Eat while warm!  Refrigerate any leftovers, and reheat in the microwave before eating.
Once again, I cannot express how incredibly delicious these were.  Wow!  I can't wait to make them again!

Also, here is my tart from Thursday that I didn't get a chance to post:  Chocolate Covered Strawberry Cheesecake Tart!

The photo isn't great.  But this time, I finely chopped some of my sugared strawberries and stirred them into the cheesecake pudding.  Then I drizzled some melted chocolate chips on top!  It was sooooo good!  Also, I can't wait to make a s'mores version with chocolate pudding and toasted marshmellows on top!

Have a yummy weekend!

Wednesday, August 14, 2013

Strawberry Cheeesecake Tart {Wednesday Wins}

Ok!  I've got a lot of wins today, so let's jump right to them!
I french braided my hair again today, and it was good enough that it held through my morning run!  Woo!
 

Today was the first day of school for the county.  And I was sitting in bed reading when the bells rang for high school classes to start.
 

To celebrate my not-first-day-of-school, I decided to pay a visit to my very best friend.  
 
Of course, it's the beach!  And it was lovely.  The waves were super tiny, and it was so quiet and peaceful.

Also, this is one of my favorite views on the planet.  When you walk up over the dunes and you catch just a glimpse of the ocean.  Love it.

I made some super yummy ham and cheese muffins for lunch, but that recipe is for another day.

Here's what you want to see today:
 Yep, I'm super proud of this single serving baby!  Actually, that's just a tiny bit of a lie though.  It made two servings.  Oh darn... I guess I'll have to eat another one tomorrow.  Boo hoo!
 This recipe is a little more involved than the "mug" recipes.  It does require an oven.  *Gasp*  And there are several steps.  But, let me tell you, it was worth it all the way!
Strawberry Cheesecake Tarts for Two
Crust adapted from Better Homes and Gardens Cookbook
Makes: 2 tarts

Ingredients for Tart Crust:
1/4 cup and 1 tablespoon flour
1 tablespoon granulated sugar
Handful of finely chopped almonds (optional)
2 tablespoons cold butter
1/2 egg yolk
3/4 teaspoon very cold water

Directions for Tart Crust:
  1. Preheat oven to 450 degrees.
  2. Combine flour, sugar, and almonds in a medium bowl.
  3. Cut in cold butter using a pastry blender or a fork until the mixture resembles coarse crumbs.
  4. In a small bowl, stir together the cold water and 1/2 egg yolk.
  5. Add the wet ingredients to the dry ingredients and knead with your hands until the dough can form a ball.
  6. If the dough isn't too sticky, you can go ahead and roll it out, but if it is sticky, cover it with plastic wrap and put it in the fridge for up to an hour.
  7. Divide the dough into two balls and roll each one into a circle that is about 5 inches in diameter.  Try to use as little flour as possible.  (I rolled mine in between two sheets of wax paper with just a tiny bit of flour on it.)
  8. Transfer each circle into a 4 inch tartlet pan (I don't have any tart pans, so I used ramekins and they worked out just fine).  Press into the pans and cut off the excess dough.  Prick the bottoms and sides several times with a fork.
  9. Cover tarts tightly with two layers of aluminum foil.  (I'm not sure why it's two layers, but that's what the cookbook said to do, so I obeyed.)
  10. Place on a cookie sheet and bake for 8 minutes.
  11. Remove aluminum foil and bake for another 5-6 minutes until crusts start to turn golden brown.
  12. Cool before gently removing from pans.
Assembling the Tarts:
While the crusts are cooling, you can prepare the filling.  Here's where you can be creative and come up with your own versions of the tart.  Below is what I did to make the tart you see in the photos, but your options are as endless as your imagination.

Filling:
1 box Jell-O Cheesecake Pudding (I used fat free, sugar free.)
1 1/2 cups cold milk
A handful of fresh strawberries
  1. Whisk together the pudding mix and the milk, then place in the fridge.  I used 1 1/2 cups milk instead of the recommended 2 cups because I wanted a nice, thick, rich filling.  *Also, you won't use all the pudding for just the two tarts, so I guess you'll just have to eat it!
  2. Once the crusts are cool, and the pudding is set, you can assemble the tart by filling it with your desired amount of pudding and garnishing with berries.  *Note: the tarts are best eaten on the day they are assembled, otherwise, the crust gets soggy with the pudding filling.
Enjoy your delicious treat!  Mine was amazing!  I'm already trying to figure out how to change it up  for tomorrow!  I'm definitely thinking chocolate!  Yum yum!

And one last win, tonight I get to have dinner with one of my best friends!  Yay for real human interaction!  Lol!