Showing posts with label Baking. Show all posts

Tuesday, September 23, 2014

Apple Cinnamon Squares

Fall is here.  And every year with fall comes all things apple.  And you know I just absolutely love apples.  So last week I whipped up a batch of these delicious apple cinnamon squares.
These are a super yummy treat that are easy to make!  You don't even need a lot of apple, and this recipe uses ingredients you probably already have in your kitchen.

Apple Cinnamon Squares
Adapted from: Allrecipes.com
Makes: a 9x9 pan

Ingredients:
1 cup all-purpose flour
1 teaspoon baking powder
1/4 teaspoon salt
1/2 teaspoon cinnamon
1/4 cup melted butter
1/2 cup brown sugar
1/2 cup granulated sugar
1 egg
1 teaspoon vanilla
1/2 cup chopped apple
 For Topping:
1 tablespoon granulated sugar
1 teaspoon cinnamon

Directions:
  1. Preheat the oven to 350 degrees.  Grease a 9x9 inch pan.
  2. In a medium bowl, stir the melted butter, brown sugar, and granulated sugar together.
  3. Stir in the egg and vanilla.
  4. Mix in the dry ingredients until just combined.
  5. Add in the chopped apple and stir.
  6. Spread the mixture into the prepared pan.
  7. Mix the extra granulated sugar and cinnamon together in a small bowl.  Sprinkle on top of the batter.
  8. Bake for 25-30 minutes until the center is set.
  9. Allow to cool in the pan and then cut into squares.
Enjoy this yummy fall treat!

Tuesday, September 16, 2014

Yep...Still Busy

So... I keep saying and thinking that I want to blog more again, and then it still falls between the cracks.  I guess you'll just have to bear with me or stop reading the blog.  Or maybe you'll find the proverbial door number three.

Anyway... I've got a new dessert recipe to post... Apple Cinnamon Squares... DELICIOUS!  I ate one about five minutes ago and could still go for another three... or four... or the rest of the pan. So, I will get that up later this week.

We haven't seen any new movies lately.  I know.  Shame.  We're working on it.

Here are some things I'm enjoying right now:
  • The apple cinnamon squares.  Seriously.  They're awesome.
  • Getting to wear my new boots (even if that means the weather is getting colder).
  • Also, my new fake TOMS.  They're gray and white, and super cute and comfy... and they were only $12!  Woohoo!
  • How great my past couple of runs have felt since the triathlon.  I've never realized how insanely good swimming is for you until now.
  • Playing chess with Thomas.  We just randomly went to Oberweiss for some delicious ice cream on Sunday afternoon and decided to play chess while we ate.  So now we're playing chess together.  And I'm getting slaughtered. every. time.
  • I'm also still super in love with my job!  It's pretty awesome.  And in case you were curious, here's an amazing video they did this weekend!  They actually have a package where they will film a wedding, edit it immediately, and then show a video at the reception!  Wow!  Talk about talent!  (And don't think I'm tooting my own horn here, I had absolutely nothing to do with the artistic beauty you see in the video!)

Wasn't that video awesome?!  I know, right!  And I get to work with these people!

Oh... also.  Stay tuned here and/or on Instagram tomorrow.  I may have some before and after photos coming up... And that's all the hint you're going to get!

Toodles!

Monday, September 8, 2014

A Short Update

I know... it has been entirely too long since I've blogged.  I've been a little busy.  Even now, I'm debating writing this short update because I only have 10 minutes until I need to be upstairs cooking dinner.  But here goes...

We're into the busy fall season at work (which is one of the main reasons I've been busy), which is great!  More hours, more responsibility!  Woohoo!

Thomas and I have seriously been enjoying country drives.  They are the main thing I missed when living in Florida (besides my family).  There's just something about driving fast down a country road while the sun is setting that makes you feel like everything's alright.

I have some major house-buying fever...  Which totally stinks considering that we're not looking for houses yet.  We have a few more months of saving before we get there, so I'm trying to be patient.

I am almost almost finished with my latest scarf.  I'm dying to put the final touches on it this week, but we'll see!

Oh, and I'm making Oatmeal Cream Pies tonight!  Yummy yummy!  Hop on over to the Recipe Index page to get the recipe!

Hopefully I will be back to blogging more often as I get used to the busier schedule!  Toodles!

Tuesday, August 26, 2014

Chicken Parmesan Meatballs

Thomas and I love love love Italian food.  And out of all of the Italian foods that exist, we really really love chicken parm.  So when I saw this recipe for Chicken Parmesan Meatballs on Pinterest, I just knew I had to make them.


And boy, did they live up to my expectations!  They were delicious!  We served them we some pasta and marinara sauce, a fresh salad, and some garlic bread!  Yum yum!


Chicken Parmesan Meatballs
Adapted from: Bake Your Day
Makes: approximately 24

Ingredients:
1 pound ground chicken
1/2 cup Italian breadcrumbs
3/4 cup freshly grated Parmesan Cheese
1 teaspoon garlic salt
1 tablespoon tomato paste
1 teaspoon Italian seasoning
2 teaspoon oregano
1 teaspoon crushed red pepper flakes
1 teaspoon parsley 
1/2 teaspoon salt
1/2 teaspoon pepper
Marinara sauce for serving
Your favorite pasta noodles for serving

Directions:
  1. Heat the oven to 375 degrees and spray a 9x13 rimmed baking sheet with cooking spray.
  2. Mix all of the  ingredients (except pasta sauce and noodles) in a large bowl until combined. I really got in there with my hands.  But beware, it's really cold.
  3. Scoop the mixture out and roll into 1-inch balls and place them on the prepared baking sheet. 
  4. Bake in the 375 degree oven for about 20 minutes until golden brown and the chicken is cooked through. The center of the meatball should read 165-170 degrees.
  5. Serve with pasta and sauce and a fresh salad!
***Freezing Note:  I made the meatballs and then froze the leftovers.  On the day we wanted to eat the leftovers, I thawed the meatballs briefly and then stuck them in the oven for about 15 minutes to warm up again, and they turned out great the second time too!

I hope you enjoy!

Friday, July 4, 2014

Jumbo Chocolate Chip Muffins

I can't believe I haven't blogged this recipe yet!  I hopped on the blog this morning to whip up a batch and realized that they weren't on here!  I was so sure that I'd blogged them that I had to go through checking for them several different ways before I was convinced enough to start writing this post.

These are Thomas' favorite muffins.  He's a sucker for chocolate chip {anything}.  And of course, I don't mind them too much either!  ; )

They are a bakery-style muffin that is designed to be made in a jumbo-size muffin tin.  However, if you don't have a jumbo muffin tin, you can make them regular sized.

These beauties have a little bit of spice in them, a lot of chocolate chips, and the perfect consistency!  There's just a tiny bit of crust on the outside, and they're soft and fluffy on the inside.

Jumbo Chocolate Chip Muffins
Makes 6-8 jumbo sized muffins or about 18 regular size
Adapted from: Sally's Baking Addiction

Ingredients:
3 cups all-purpose flour
4 teaspoons baking powder
1 teaspoon salt
1 teaspoon cinnamon
1/4 teaspoon nutmeg
2 eggs
1 cup sugar
1 cup milk + 1 tablespoon white vinegar (or 1 cup buttermilk)
1/2 cup canola oil
1 teaspoon vanilla
heaping 1 1/2 cups milk chocolate chips

Directions:
  1. Preheat the oven to 375 degrees.  Prepare your muffin tins with either paper liners or cooking spray.
  2. In a large bowl,  combine the flour, baking powder, salt, cinnamon, and nutmeg.  Toss together.
  3. In a medium bowl, whisk together the sugar and eggs.  Then add the milk, oil, and vanilla, and whisk.
  4. Add the wet ingredients into the dry ingredients and stir as little as possible with a spatula.
  5. Fold in the chocolate chips.
  6. Spoon batter into the prepared muffin pans.  Fill each cup about 3/4 full.
  7. Bake jumbo muffins for 30-35 minutes.  Bake regular sized muffins for about 20 minutes.  Tops should be very lightly browning and a toothpick inserted into the center should come out clean.
  8. Turn out onto a cooling rack and enjoy!
These muffins are super delicious!  I hope they remind you of your favorite bakery!

Wednesday, June 25, 2014

Recent Happenings

Well, I have felt really busy lately.  I'm not as busy as a lot of people, but I'm still just having a hard time adjusting to all of the changes we've gone through since the move. 

Last week, I planted flowers in my mother-in-law's planters.  I was pretty excited because I bought most of the plants on clearance, and for the most part, they're perking up pretty well!  We've had quite a bit of rain lately, so they're certainly not thirsty!  These photos are from just a few days after planting, and they're even starting to look better!  Yay!


I've also had my first Smoothie King since moving back, and man was it de-li-cious!!!  Raspberry Sunrise, I love you!

Thomas and I have gone on a couple country drives so far, and I can honestly say that those are the times when I'm truly happy we're here.  The hills and valleys, the winding roads, the sunshine and shade.  Country drives are amazing.

I also went kayaking with my mom over the weekend.  It was so incredibly peaceful and relaxing.  I got a mondo sunburn from it, but it was totally worth it!

I am really loving my new job too!  The people I work with are so easy-going and fun, and I look forward to getting to go to work!  In case you're curious, I'm working for a wedding videography and photography studio.  (Of course I have no talent for filming or editing, but I get to do all of the scheduling and office work.)  I sort of really love working with artists, because I totally understand the creative side of things, but I get to be the organized calm in the middle of the creative chaos.  It's super fun!

I've been making a few changes to my fitness program, trying to find a new rhythm.  I'm getting a bike for my birthday (hopefully before my birthday), so until then, the bike riding is on hold.  I also don't have a place to swim on a regular basis, and that's the part that's making me the most nervous.  I'm fair at swimming, but I was just getting the hang of the form and breathing of lap swimming before we moved.  So, I'm going to have to figure out what to do with that.  But the running is still going well.  I've changed Wednesdays to speed days where I run a 5k and try to beat last week's time every week, so that's what I did this morning.  Mondays and Saturdays are the longer runs now.  But that's enough about my fitness routine...

Oh!  I almost forgot that I started a new scarf this weekend!  If you follow me on Instagram, you would have seen a preview of that.  But now I've got the loom all warped up, and I wove the first few rows the other night, so here's a sneak peek!  (The dark blue is the warp; the white is just filler.)

That's about all I've got going right now.  I did bake a batch of the Gooey Funfetti Cake Bars for everyone to take with their lunches this week, and boy are they good!  If you haven't tried them yet, you should!  (Ha!  That kind of rhymed.)

Saturday, June 7, 2014

Gooey Funfetti Cake Bars

I made these delicious cake bars last week for the wonderful friends who came over to help us move out of our apartment in Florida.  I knew they were going to work so hard (and they did), so I wanted to make sure that I had something special to treat them with.

As I was scouring through my dessert boards on Pinterest, I saw these, and I just knew they would be perfect!  Lots of sprinkles, chocolate chips, and of course, a super gooey center.

They could have been slightly better if I hadn't gotten them a little over done in the oven.  Of course, I set the timer when I put them in, but then I went and worked on packing.  So when the timer went off, it didn't register in my brain until a few minutes later, at which point, I screamed and sprinted into the kitchen, all while Thomas was frantically asking "WHAT???" and looking at me like I was crazy. 

So they were a little crunchy on the outsides (a little crunchier than I'd prefer) but still gooey and delicious in the center.  I will definitely be making these again!!!


Gooey Funfetti Cake Bars
Adapted from: Crazy for Crust (You should really go check out her pictures; my one snapshot does not do these delicious things justice.)
Makes: 16 squares (a 9x9 pan)

Ingredients:
1 box Funfetti cake mix (just the dry mix)
1/2 cup butter, softened
1 egg
1/3 cup sprinkles
1/2 cup sweetened condensed milk (out of a can)
1 cup chocolate chips/chunks (You can use any variety.  I used half white chocolate and half milk chocolate.)

Directions:
  1. Preheat oven to 350 degrees.  Line a metal 9x9 pan with parchment paper.
  2. Combine cake mix, softened butter, and the egg in a bowl.  Blend with a mixer until a thick dough forms.
  3. Divide dough and press 2/3 of it into the prepared pan.  (I used wax paper to help me make it a little more even.)
  4. Sprinkle with the chocolate chips/chunks, the sprinkles, and pour the sweetened condensed milk on top.
  5. Roll the remaining dough into balls and then smoosh them flat and lay them on top of the mixture.  Try to cover as much of the pan as possible.  (Once again, I used a sheet of wax paper over top to smoosh it all together.)
  6. Bake the bars for 30 minutes or until the edges begin to brown.
  7. Remove from oven, and use the parchment paper to remove the bars from the pan.  Place on a wire rack to cool before cutting into 16 squares.
Like I said, even slightly burnt, these were amazing!  If you like gooey butter cookies, chess squares, or whatever else they're called, you should try this fun variation!

Friday, June 6, 2014

A Funny Story

Ok... So I have to tell this story, mostly because I can't hardly believe it myself.

I had an interview today for a job I was pretty excited about.  So, naturally, I was so nervous I could hardly think about anything else.  (I get incredibly, stupidly nervous about a lot of things.)  And when I'm nervous about things, I tend to "kind of" dream about them.

Now, here's what I mean about "kind of":  If you didn't know me, and I just walked up to you on the street and told you about the dream I had last night, you would think I was on acid or something.  Literally.  My dreams are insanely weird.  I promise that I couldn't make this stuff up or make it weirder if I tried.  I don't know what happens to my brain when I go to sleep, but it goes nuts!  (I guess it's all the crazy I cage up during the day seeping out at night.)

So, anyway, I had a dream of my interview last night, but of course, it was super weird.  Here's the gist:

I walked in to a busy office and there were a bunch of people around having a meeting or something and generally ignoring me while I waited for the person I was supposed to interview with.  (I was also doing some sort of weird swaying back and forth thing at this point and chastising myself for swaying around inside the office with people around.)  When the guy brought me back into the office for the interview, he was talking about a lot of pop culture, movies, and books, etc.  And on his desk, he had a collection of TARDIS from the show "Doctor Who" which he pointed out to me.  (Thomas and I are HUGE "Doctor Who" fans.)  He was asking me how many of the "Classics" I'd read (like, classic old books), and I, trying to sound smart, mentioned that I'd recently read Anna Karenina (because I haven't read a ton of the classics).  Then he explained that, in his opinion, the most important "Classic" is The Lord of the Rings, which I didn't really think counted...  There's more detail to the dream, but let's get to the point of this story.

This morning when I woke up, I thought my dream was, as usual, weird, but I didn't put much stock into it because my dreams are always weird.  But when I got to the interview today...

The very first thing I saw when I opened the door was... an almost-life-size cardboard cut out of a TARDIS...  And I just stood there for a minute with my mouth hanging open...  And then I continued into the office and turned back around just to make sure I hadn't imagined it...  There it was... A TARDIS... in the office... really similar to my dream.

I can't believe that even a small portion of my ridiculous nerves-induced dream came true.  I'm still baffled by it.  You probably don't think this is as crazy as I do, but I just had to put it out there.

Anyway, I will have the dessert recipe up tomorrow.  Here's a peek (I don't have any great photos for it because I made these in the process of the move).

Gooey Funfetti Cake Bars... yummy!  Even a little over-done, these things were delish!

Saturday, May 3, 2014

Brownie for One

I have tried several single serving brownie recipes, and most of them have hardly been worth eating.  This one, however, truly blew me away.  It was delicious!  The consistency was perfect, and the melted chocolate chips added just the right touch.  Oh so yum!

This makes a sizable brownie, so you may want to think about sharing it with a friend.  It would go absolutely wonderfully with a scoop of vanilla ice cream on top too!

So, before I start drooling all over my keyboard, let me just give you the recipe.  It comes from No. 2 Pencil, and she has got quite a few great single serving recipes that you can view here.

Brownie for One
From: No. 2 Pencil

Ingredients:
2 tablespoons butter (not margarine)
2 tablespoons sugar
1 tablespoon brown sugar, packed
1 egg yolk
1/4 cup flour
1 tablespoon unsweetened cocoa powder
2 tablespoons chocolate chips

Directions:
  1. In a mug or ramekin, melt the butter.
  2. Stir in the sugars.
  3. Add the egg yolk and stir.
  4. Lastly, add in the flour, cocoa powder, and chocolate chips, and stir until completely blended.
  5. Microwave for 45-60 seconds.  (Mine took the full minute.)
  6. Allow to cool slightly (if you can) before enjoying.
Ooh, this one is so yummy.  I hope you enjoy!  Happy weekend!

Wednesday, April 30, 2014

Auntie Anne's Copycat Pretzels

 *Sorry about the low quality photos.  It was late when I made these, and I was really impatient to eat them.


Saturday was National Pretzel Day.  And as a foodie, I knew I just couldn't pass up a "holiday" like that.  So, after dinner, I set to work making a very, very small portion of this recipe.  Literally, I eighth-ed it.  Yeah.  The measurements got a little wonky, but it was a perfect amount to not have a ton of leftovers sitting around the house begging me to eat them.

Now, I have had several different soft pretzel recipes over the years.  And I have to say, these were by far the best I've ever had.  I did really like the One-Hour Soft Pretzels I tried a few weeks ago, but they weren't the consistency of a regular soft pretzel.  These, however, were so soft.  They were perfectly flavored.  They were amazing.

My pretzels browned really quickly while baking, and I wanted to make sure they were done in the middle before I committed to taking them out.  So I took one off the baking sheet and tore it in half right out of the oven.  Of course, I tasted it to make sure it wasn't doughy... And ended up scarfing the whole thing down, juggling it back and forth in my hands and blowing on it and still burning my mouth.  It was that good.  I didn't even wait to brush on the butter or sprinkle a little extra salt on top of that one.  These. were. amazing.

Auntie Anne's Copycat Pretzels
Makes: 12 pretzels
Adapted from: Cooking Classy

Ingredients:
2 cups milk
1 1/2 tablespoons active dry yeast
6 tablespoons light-brown sugar, packed
4 tablespoons butter, at room temperature
4 1/2 cups all-purpose flour, plus more as needed
2 teaspoons salt

1/3 cup baking soda
3 cups warm water
coarse salt, to taste
6 Tbsp butter, melted

 Directions:
  1. Warm the milk to approximately 110 degrees.  Add the yeast and stir until dissolved.  Allow the mixture to rest for 5 minutes.
  2. In a medium-large bowl, combine the yeast/milk, brown sugar, 4 tablespoons butter, 1 cup flour, and salt.  Whisk together until blended.
  3. Add the remaining 3 1/2 to 4 cups of flour and knead until the dough pulls away from the sides of the bowl.  (You can use a stand mixer with the dough hook if you have one; I just did it by hand.)  Cover the bowl with plastic wrap and let rise in a warm place for 1 hour.
  4. Preheat the oven to 450 degrees.  Line two baking sheets with parchment paper.
  5. Punch the dough down and divide into 12 portions.  (Or if you want smaller pretzel bites or sticks, divide as you see fit.)
  6. Roll each portion into a long rope.  Cooking Classy suggests 32-36 inches.
  7. Combine the baking soda and warm water in a shallow bowl.  Dip each pretzel rope into the mixture, making sure it gets completely coated.  Place on the prepared baking sheet and shape as desired.  Sprinkle with small amount of coarse salt.
  8. Bake for 7-9 minutes, until golden brown.  Melt the 6 tablespoons butter.
  9. Brush each pretzel with melted butter and sprinkle with more salt if desired.
You absolutely must try these pretzels.  They are the most delicious pretzels I've ever tasted that I did not buy at Auntie Anne's.  Enjoy!

Monday, April 28, 2014

Recipes to Come and Randoms

The past week has not been a normal one for me.  But, of course, in every week, I try to find some little lovelies that make me smile.  So here they are.

First of all, I successfully completed week one of my running program.  (Woohoo!)  I'm not really worried about being able to keep up with it until it comes to week four or so.  Once the distances move into ones I've never run before I don't know if I'll be able to progress that quickly, but we'll see.  The program is pretty basic; I'm running three times a week with some other various exercises on the off days.  So last week I ran 5.3 miles over three sessions.  This week, it will be more.  Yikes!

I tried out a few new dessert/snack recipes last week/weekend, so I'll be sharing those over the course of this week.  Watch out for the soft pretzels.  They were amazing!!!  The single serve brownie was delicious too!


I also made this Hot Fudge Pie for dessert at a friend's house on Friday.  It was pretty delicious and went perfectly with some ice cream and chocolate sauce.  Yum!

My latest scarf is off the loom, but I haven't gotten around to finishing it yet.  I'm still waffling between making it an infinity scarf or a regular one so that's holding me up.  This week I am determined to make up my mind and finish it!

One last one, but possibly the biggest:  I really love the Bible study I'm doing right now.  God is speaking to me so intimately through it, and I find myself growing each day.  I absolutely love it when God allows your Bible study to speak very specifically on something you're going through in that moment.  That happened to me this week when I was really struggling with faith and with believing God, and BAM!  That's exactly what my Bible study was about that day.

God is so perfect, and things like that continually show me that believing Him is so very worth it.  It's harder to put into practice than it is to say in words, but each day, I am working to live my faith in Him.  He is mighty!

Here's to another week where only God knows what is to come!

Monday, April 21, 2014

Last Week in Photos {Lundi Little Lovelies}

I know I was a little absent from the blog at the end of last week.  Though, if you follow me on Instagram, you would have seen a few updates.  So here is quite a bit of last week in photos.


Thursday, I made my first ever batch of croutons.  I know, right?!  I'm such a foodie, so it's crazy that I've never made them before.  Honestly, I'd just never really thought about it.  I didn't really use a recipe.  I just cut up some bread I'd made earlier in the week, added some butter, olive oil, and seasonings, and stuck them in the oven.  And they turned out pretty awesome!


Also on Thursday, I made a half batch of my yummy and healthy Cinnamon Raisin Oatmeal Muffins.  I had the egg white to use up from the Single Serving Peanut Butter Cookies I made eariler in the week, so these muffins were the perfect thing!  I left out the raisins this time but added some crushed almonds.  Woowee!  The little bit of crunch from the almonds was delish!  I had the last one this morning with some peanut butter slathered on top.  (I may have forgotten to mention that I am absolutely obsessed with Jif Natural Peanut Butter right now.  I swear.  I'm eating it on EVERYTHING!  I truly think the natural tastes like nine million times better than the regular kind.  Maybe I'm crazy though.)

And another thing from Thursday (apparently I was pretty productive that day): I started on a new scarf!  Here is the progression it went through on Thursday and Friday.

I started out knowing I wanted to use the variegated "film reel" yarn in the left-middle, but I had no idea what I wanted to use with it.


Here are the final five.  I used these to warp the loom randomly as shown below.


Here's the warp getting ready to be wound on the loom.


And here we have my two options for the weft.  (I did have a third, the hot pink-ish color, but I already ruled that one out.)  After a few days of letting it sit and walking past it a hundred times looking at it, Thomas and I are both leaning towards the top, darker silver.  I like the funkiness of the bottom black/silver, but the top yarn is a little calmer and much, much softer.  So, I will probably get those samples un-woven today and start weaving for real!


Friday, I got a haircut.  It's not a huge difference, just cutting the split ends off and putting some layers back into it, but I like it.


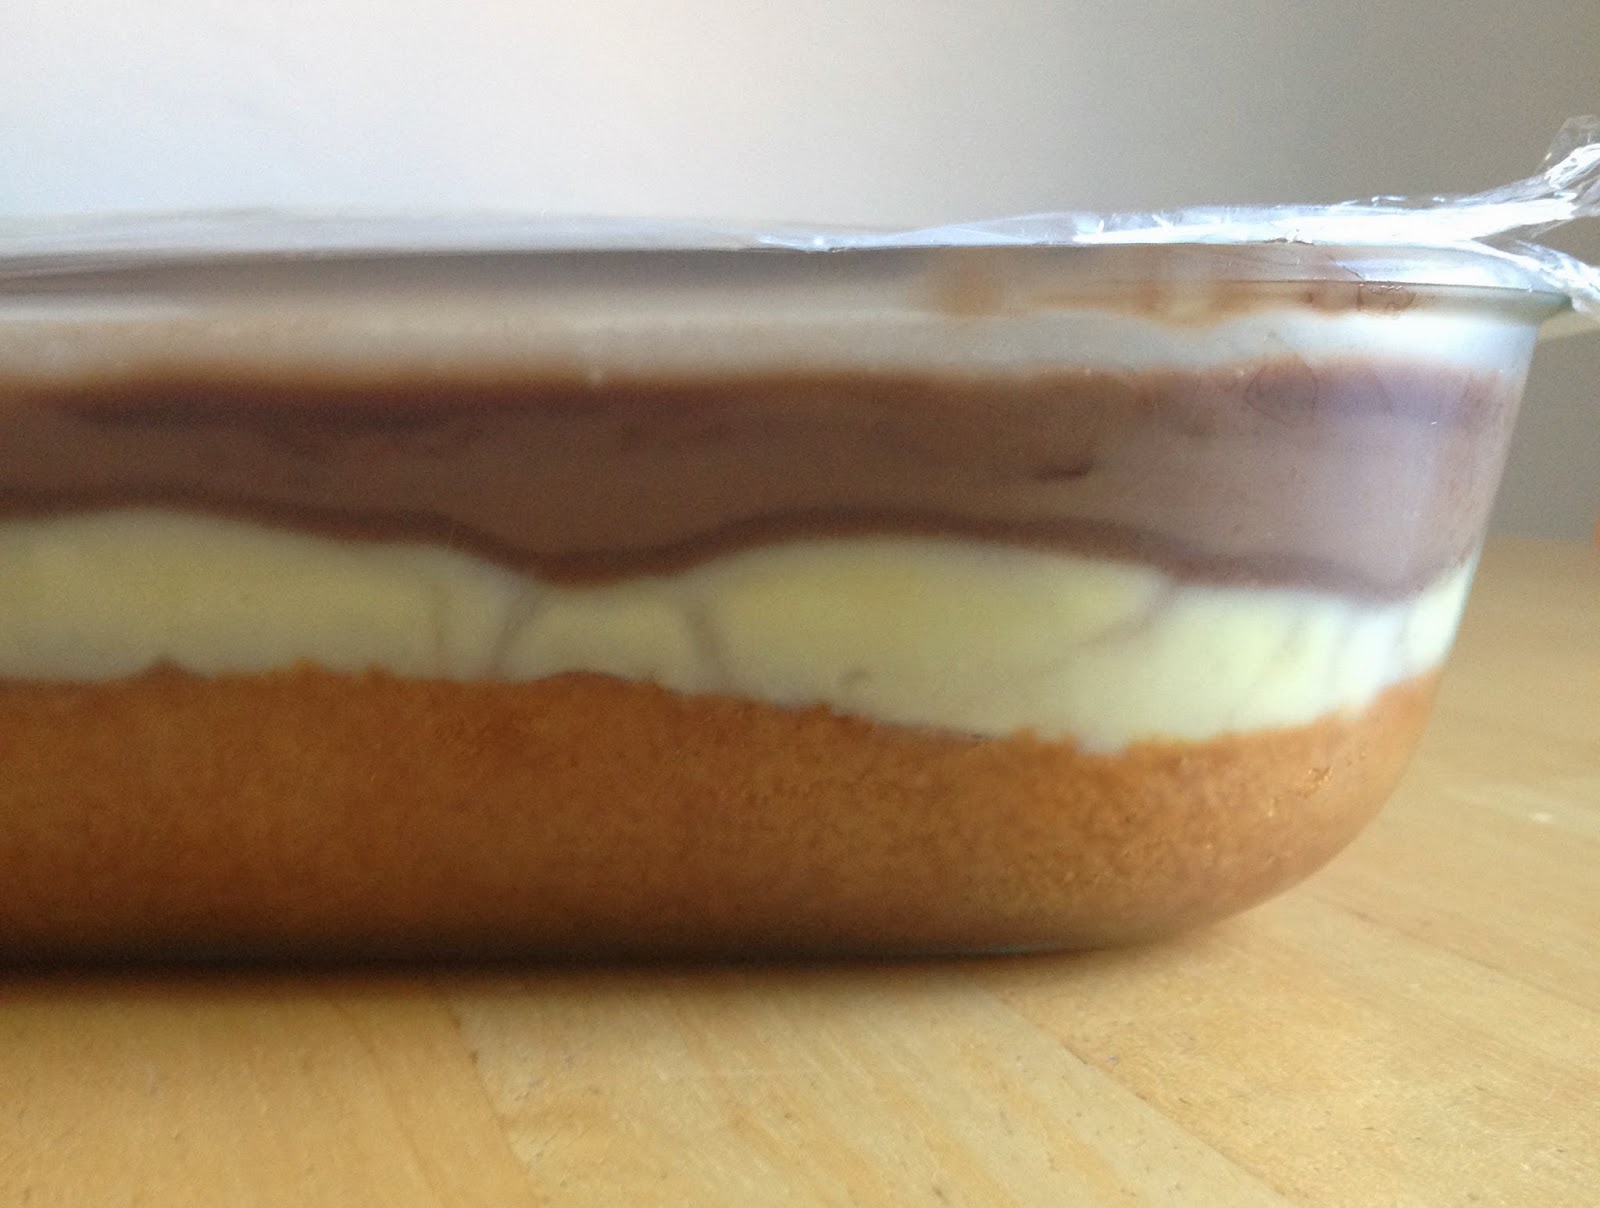
Saturday, I made this baby for our Easter get together at some friends'.  Boston Cream Poke Cake.  Oh yum!  This is one of my favorite cakes, and it's so incredibly easy to make!  Just bake a yellow cake, poke a ton of holes into it, pour on vanilla pudding and then cover with chocolate ganache!  So, so, so good!  Except for the fact that we brought way too much back home with us!  Now I'm going to have to get fat or find someone to help us eat it!

And lastly, I did some idle shopping on Saturday afternoon and came up with a great project to add some more coral to the bedroom!  The best part: for this project, I spent a total of $6!!!  Sunday, I put it all together, and voila cute bedroom wall art!


It all started as I was strolling through Michael's with no intention whatsoever except to take up some time.  I happened upon the scrapbook papers and found some adorable sheets that matched my coral pillow exactly!  (And how did I know they matched exactly?  I now carry a swatch of that fabric in my wallet so that I can pull it out anywhere, anytime if I find something coral.)  The 12x12 sheets were only $.59 a piece!  So, I continued strolling through the store while I let the ideas formulate in my head.  I ended up with two corals and two grays.  Then I headed across to the dollar store to grab some $1 8x10 frames.  Print and cut out some letters, put it all together, and here's what I got!


I just L-O-V-E it!  Haha!  And I loved the $6 price tag even more!

Well, that about brings you up to speed on my life!  I did start a new running program today, but I'm not quite ready to share it with anybody because I'm pretty sure I'm going to fail miserably at it.  (It looks really hard.)  But, I will maybe share it in a few weeks if it hasn't killed me by then!

I hope you find a few little lovelies in your own life to get you through Monday!

Wednesday, April 16, 2014

Peanut Butter Cookies for One


O. my. goodness.

Last night, I found myself at home alone (which is not normal for the evenings).  And as I was sitting around doing very little of anything, I suddenly needed some peanut butter cookies.  I love peanut butter cookies.  And they're never a cookie Thomas would choose to eat.  Sure, if I make them, he'll probably break down and have a few just because they're there.  But, usually, peanut butter cookies are all mine to eat.

So this recipe is absolutely perfect for me!  It's a single serving cookie recipe.  And, I've done some single serving desserts previously (check out the Recipe Index), but never a traditional cookie, baked-in-the-oven, recipe.


These cookies were perfect!  Seriously.  They tasted amazing and were so soft and moist that they just fell apart in my hands and melted in my mouth.  Depending on what size you make your cookies, you could get anywhere from 2 to 10 cookies from this recipe.  Yes, it's a "single serving" recipe, but if you know what's good for you, you probably shouldn't eat all of the cookies in one sitting.  (Apparently I don't know what's good for me.)  But, oh, it was worth it!

This recipe comes straight from No. 2 Pencil, and she has several single serving recipes of all different varieties.  And if you're into these types of recipes, you should definitely check out the blog.  I have yet to try one of her single serving desserts that I did not like!  You go, girl!


Peanut Butter Cookies for One
From: No. 2 Pencil
Makes: 2-10 cookies depending on size

Ingredients:
2 tablespoons butter
3 tablespoons brown sugar, packed
Pinch of salt
1/4 teaspoon vanilla extract
2 tablespoons peanut butter
1 egg yolk
1/4 teaspoon baking soda
1/4 cup + 1 tablespoon all-purpose flour

Directions:
  1. Preheat oven to 350 degrees, and line a baking sheet with parchment paper.
  2. In a small bowl, microwave butter until softened (a little melted is fine).
  3. Stir in brown sugar, salt, and vanilla.
  4. Add peanut butter, and stir until combined.
  5. Separate the egg white and yolk, and stir in only the yolk.
  6. Add the baking soda and flour, and stir one final time.
  7. Using your hands, roll the dough into as many cookies as you like and place them on the parchment-lined baking sheet.  Flatten slightly with a fork.
  8. Bake for 8-10 minutes, until the edges start to turn golden brown.
  9. Remove cookies to a cooling rack to cool.
  10. Enjoy with a glass of milk for dipping!  Yummy!
Ooh, I could make these again right now.  But, since it's ten in the morning, I guess I will refrain!

Monday, April 14, 2014

Buttercream... Buttercream...


(I almost can't say this word without thinking about that scene from Rush Hour 2 "... buttercream, buttercream, croc skin, buttercream...")

This is a lovely little recipe for a killer butter cream frosting!  My mom makes a fabulous cake icing that is so rich you need a glass of milk with it.  And it has been my go-to icing recipe for a long time.  But, for piping cupcakes, it's a little too rich and heavy.

So, I hopped on Pinterest the other night when I needed a fluffier recipe, and I had some very strict criteria.  Turns out I only had one stick of butter and half a bag of powdered sugar, and my cupcakes needed iced immediately, so no last minute store runs.

After a little searching, I came across this recipe several times from different people, and the photos made it look like the type of icing I was looking for.  And mainly, it met my butter and sugar limitations.  But it turned out to be a really great icing recipe!

This icing was thick and creamy.  It piped on and held its shape really well.  And most importantly, it tasted great but wasn't so powerful that you completely lost the flavor and goodness of the cake underneath of it.

If you're looking for an easy and delicious buttercream recipe, this is it!


Vanilla Buttercream Icing
Will ice 24 cupcakes

Ingredients:
1 stick (1/2 cup) butter, room temperature
4 cups powdered sugar
1 teaspoon vanilla extract
2 tablespoons milk

Directions:
  1. Let the butter come completely to room temperature before starting.  No microwaving it to speed up the process.  You want it softened, not partially melted.
  2. Using an electric mixer, whip the butter for about one minute.
  3. Add the powdered sugar, vanilla, and milk.  Begin by mixing on a slow speed (just so you don't zing powdered sugar all over your kitchen), then increase the speed.
  4. Continue mixing until all ingredients are completely incorporated and the icing is smooth and evenly textured.
  5. Pipe or frost as desired!
  6. If you know what's good in life, you'll also add sprinkles!  :) 
Biting into one of these cupcakes was definitely a little slice of contentment!

Wednesday, April 9, 2014

One Hour to Delicious Soft Pretzel Bites


Yum!  Really.  These pretzel bites are the perfect treat for a Saturday afternoon or a night at home with a movie.  They're ready in under an hour and really easy to make.  What more could you ask for in a home-made snack?!

You can change your toppings to suit your every whim.  If you like your pretzels salty with some cheese sauce or mustard, you got it!  For all you sweet tooth's out there, try cocoa or cinnamon sugar.  I tried out a cinnamon sugar mixture and a cocoa and sugar mixture.  Then the hubs and I chowed down on these with some Oreo Filling Dip.  Yum yum yum!


One Hour Pretzel Bites
Adapted from: Averie Cooks
Makes: about 30 small bites

Ingredients:
1 1/4 teaspoon active dry yeast
3/8 cup (1/4 cup + 2 tablespoons) warm water
1/2 teaspoon granulated sugar
1 cup all-purpose flour
1/4 teaspoon salt
1/2 tablespoon canola/vegetable oil
2 tablespoons butter, melted (for brushing)
Optional Toppings:
Kosher salt and mustard or cheese sauce
3 tablespoons granulated sugar + 2 tablespoons cinnamon
3 tablespoons granulated sugar + 2 tablespoons cocoa powder

Directions:
  1. Begin by proofing your yeast.  Stir together the yeast, sugar, and warm water in a small bowl or measuring cup.  Let it sit for 10 minutes.  (If the yeast foamed up and about doubled, you're ready to move on.)
  2. Stir together the yeast mixture, flour, salt, and oil.  Knead for about 5 minutes either by hand or with a stand mixer.  The dough will be firm and smooth.
  3. Divide into two lumps and using your hands, roll each one out into a long rope (about the length of your cookie sheet).  No need to flour the counter for this step.  Then cut each rope into 1 inch sections.
  4. Place on a cookie sheet lined with parchment paper or sprayed with cooking spray.  Make sure none of the bites are touching.
  5. Preheat your oven to 350 degrees and allow the bites to rest on the stove while the oven is warming up.
  6. Bake for about 16-18 minutes, until the pretzels are just barely starting to brown.  You don't want to over cook them because the will turn out hard.
  7. While the pretzels are in the oven, melt the 2 tablespoons of butter and prepare your toppings.
  8. When the pretzels come out of the oven, brush them generously with butter and top with your desired toppings.  *An easy way to top these is to place your topping in a large baggie, then throw the bites into the baggie and shake it all up.
  9. Enjoy!  Store any leftovers in an airtight container.  Before eating leftovers, place in microwave for about 15-30 seconds to warm and soften them.  Eat within two days.