Wednesday, April 30, 2014

Auntie Anne's Copycat Pretzels

 *Sorry about the low quality photos.  It was late when I made these, and I was really impatient to eat them.


Saturday was National Pretzel Day.  And as a foodie, I knew I just couldn't pass up a "holiday" like that.  So, after dinner, I set to work making a very, very small portion of this recipe.  Literally, I eighth-ed it.  Yeah.  The measurements got a little wonky, but it was a perfect amount to not have a ton of leftovers sitting around the house begging me to eat them.

Now, I have had several different soft pretzel recipes over the years.  And I have to say, these were by far the best I've ever had.  I did really like the One-Hour Soft Pretzels I tried a few weeks ago, but they weren't the consistency of a regular soft pretzel.  These, however, were so soft.  They were perfectly flavored.  They were amazing.

My pretzels browned really quickly while baking, and I wanted to make sure they were done in the middle before I committed to taking them out.  So I took one off the baking sheet and tore it in half right out of the oven.  Of course, I tasted it to make sure it wasn't doughy... And ended up scarfing the whole thing down, juggling it back and forth in my hands and blowing on it and still burning my mouth.  It was that good.  I didn't even wait to brush on the butter or sprinkle a little extra salt on top of that one.  These. were. amazing.

Auntie Anne's Copycat Pretzels
Makes: 12 pretzels
Adapted from: Cooking Classy

Ingredients:
2 cups milk
1 1/2 tablespoons active dry yeast
6 tablespoons light-brown sugar, packed
4 tablespoons butter, at room temperature
4 1/2 cups all-purpose flour, plus more as needed
2 teaspoons salt

1/3 cup baking soda
3 cups warm water
coarse salt, to taste
6 Tbsp butter, melted

 Directions:
  1. Warm the milk to approximately 110 degrees.  Add the yeast and stir until dissolved.  Allow the mixture to rest for 5 minutes.
  2. In a medium-large bowl, combine the yeast/milk, brown sugar, 4 tablespoons butter, 1 cup flour, and salt.  Whisk together until blended.
  3. Add the remaining 3 1/2 to 4 cups of flour and knead until the dough pulls away from the sides of the bowl.  (You can use a stand mixer with the dough hook if you have one; I just did it by hand.)  Cover the bowl with plastic wrap and let rise in a warm place for 1 hour.
  4. Preheat the oven to 450 degrees.  Line two baking sheets with parchment paper.
  5. Punch the dough down and divide into 12 portions.  (Or if you want smaller pretzel bites or sticks, divide as you see fit.)
  6. Roll each portion into a long rope.  Cooking Classy suggests 32-36 inches.
  7. Combine the baking soda and warm water in a shallow bowl.  Dip each pretzel rope into the mixture, making sure it gets completely coated.  Place on the prepared baking sheet and shape as desired.  Sprinkle with small amount of coarse salt.
  8. Bake for 7-9 minutes, until golden brown.  Melt the 6 tablespoons butter.
  9. Brush each pretzel with melted butter and sprinkle with more salt if desired.
You absolutely must try these pretzels.  They are the most delicious pretzels I've ever tasted that I did not buy at Auntie Anne's.  Enjoy!

Monday, April 28, 2014

Recipes to Come and Randoms

The past week has not been a normal one for me.  But, of course, in every week, I try to find some little lovelies that make me smile.  So here they are.

First of all, I successfully completed week one of my running program.  (Woohoo!)  I'm not really worried about being able to keep up with it until it comes to week four or so.  Once the distances move into ones I've never run before I don't know if I'll be able to progress that quickly, but we'll see.  The program is pretty basic; I'm running three times a week with some other various exercises on the off days.  So last week I ran 5.3 miles over three sessions.  This week, it will be more.  Yikes!

I tried out a few new dessert/snack recipes last week/weekend, so I'll be sharing those over the course of this week.  Watch out for the soft pretzels.  They were amazing!!!  The single serve brownie was delicious too!


I also made this Hot Fudge Pie for dessert at a friend's house on Friday.  It was pretty delicious and went perfectly with some ice cream and chocolate sauce.  Yum!

My latest scarf is off the loom, but I haven't gotten around to finishing it yet.  I'm still waffling between making it an infinity scarf or a regular one so that's holding me up.  This week I am determined to make up my mind and finish it!

One last one, but possibly the biggest:  I really love the Bible study I'm doing right now.  God is speaking to me so intimately through it, and I find myself growing each day.  I absolutely love it when God allows your Bible study to speak very specifically on something you're going through in that moment.  That happened to me this week when I was really struggling with faith and with believing God, and BAM!  That's exactly what my Bible study was about that day.

God is so perfect, and things like that continually show me that believing Him is so very worth it.  It's harder to put into practice than it is to say in words, but each day, I am working to live my faith in Him.  He is mighty!

Here's to another week where only God knows what is to come!

Friday, April 25, 2014

Thin Crust Pizza


Today let's talk thin crust pizza.

If you don't love it, we can't be friends.  We just can't.

Though I am a huge sucker for a really good quality piece of a Sicilian pizza, thin crust will always be my tummy's favorite.  Always.

I am really not a huge fan of pan pizzas.  Especially chain pizza place ones.  Yuck.  They're just so tough.  And don't even get me started on stuffed crust pizzas.  Double yuck.

But anyway, thin crust pizza calls to my heart... or... stomach actually.

Until very recently, I had not branched out in my pizza crust recipe.  Growing up, we had homemade pizzas once every week or two.  Usually on Friday family movie nights.  And my mom's crust recipe is great.  And I grew up with it.  Why fix something that's not broken, right?!

But then Pinterest comes along and entices me with beautiful photos promising the loveliest crust of all time.  So I've recently tried some new recipes.  All of which are good.  Not many that wow me.  But here is one of the few that did.

Thin. Crust. Pizza.  Genuine, paper-thin, crispy, "Imo's"-like pizza crust.  Oh yummy!  There are just a few things that I miss about St. Louis, and Imo's Pizza is one of them.  So many nights in college, watching out the window of Thomas' dorm room while he walked across the street in the cold/snow to pick up our extra large, thin crust, pepperoni and green olive pizza.  Salivating...

This pizza may not taste just like Imo's because apparently nobody knows what provel cheese is once you cross out of the St. Louis area, but it's pretty darn close.

And the one thing (besides the super thin crust) that sends this pizza over the top: the Italian seasoning.  Just shake some on top of everything right before you stick the pizza in the oven and wow, it completely takes the pizza to the next level.  DO NOT forget that step!

Oh!  And the other other thing that makes this pizza totally awesome: the dough doesn't need to rise, so you can make these from start to finish in about 30 minutes!  It's definitely worth a try for that fact alone!

Now without further ado:


Thin Crust Pizza
Adapted from: Cinnamon Spice and Everything Nice
Makes: two 12 inch pizzas
Feeds: 2-4 people (The thin crust makes these pizzas seem not quite as filling as traditional crusts.)

Ingredients:
Scant 2 cups all-purpose flour
1 tablespoon baking powder
1/2 teaspoon salt
2 tablespoons canola/vegetable/olive oil
1/2 cup water
1 cup pizza sauce
+/-3 cups cheese (traditionally mozzarella, but feel free to branch out)
You choice of toppings
Italian seasoning

Directions:
  1. Preheat the oven to 425 degrees.  Spray two pizza pans with cooking spray.  (You can use cookie sheets, but I highly suggest pizza pans to make the crust crunchier.)
  2. Combine the dry ingredients in a mixing bowl, and give them a quick toss.
  3. Add the oil and water, mix until a shaggy dough forms.  You will have to get in there with your hands and press the dough together.  Add a tiny bit more water if the dough won't hold together.
  4. Separate the dough into two portions, and form them into small disks.  The rounder the disks are, the better-shaped your pizzas will be.  Wrap each disk in saran wrap and let rest for 10 minutes.
  5. Spray a piece of wax paper with cooking spray.  Unwrap a disk of dough and lay it on the wax paper.  Then cover with another sheet of sprayed wax paper.  (I just use one big long piece and fold it in half.)  Roll into a 12 inch, very flat crust. (This will take a lot of arm strength.  Just keep rolling.)
  6. Place the dough on your sprayed pizza pan, cover with approximately 1/2 cup pizza sauce, your choice of toppings, and cheese.
  7. Sprinkle the top of the pizza with Italian seasoning.
  8. Bake for 9-12 minutes, until the cheese starts to brown.  Once it's out of the oven, i
    f you're using a traditional baking sheet, I suggest sliding the pizza onto a wire rack to cool.  This helps it stay crunchy instead of turning soggy.
  9. Repeat for second disk of dough.
  10. Enjoy!
Oh!  I love this pizza!  I hope you do too!

Monday, April 21, 2014

Last Week in Photos {Lundi Little Lovelies}

I know I was a little absent from the blog at the end of last week.  Though, if you follow me on Instagram, you would have seen a few updates.  So here is quite a bit of last week in photos.


Thursday, I made my first ever batch of croutons.  I know, right?!  I'm such a foodie, so it's crazy that I've never made them before.  Honestly, I'd just never really thought about it.  I didn't really use a recipe.  I just cut up some bread I'd made earlier in the week, added some butter, olive oil, and seasonings, and stuck them in the oven.  And they turned out pretty awesome!


Also on Thursday, I made a half batch of my yummy and healthy Cinnamon Raisin Oatmeal Muffins.  I had the egg white to use up from the Single Serving Peanut Butter Cookies I made eariler in the week, so these muffins were the perfect thing!  I left out the raisins this time but added some crushed almonds.  Woowee!  The little bit of crunch from the almonds was delish!  I had the last one this morning with some peanut butter slathered on top.  (I may have forgotten to mention that I am absolutely obsessed with Jif Natural Peanut Butter right now.  I swear.  I'm eating it on EVERYTHING!  I truly think the natural tastes like nine million times better than the regular kind.  Maybe I'm crazy though.)

And another thing from Thursday (apparently I was pretty productive that day): I started on a new scarf!  Here is the progression it went through on Thursday and Friday.

I started out knowing I wanted to use the variegated "film reel" yarn in the left-middle, but I had no idea what I wanted to use with it.


Here are the final five.  I used these to warp the loom randomly as shown below.


Here's the warp getting ready to be wound on the loom.


And here we have my two options for the weft.  (I did have a third, the hot pink-ish color, but I already ruled that one out.)  After a few days of letting it sit and walking past it a hundred times looking at it, Thomas and I are both leaning towards the top, darker silver.  I like the funkiness of the bottom black/silver, but the top yarn is a little calmer and much, much softer.  So, I will probably get those samples un-woven today and start weaving for real!


Friday, I got a haircut.  It's not a huge difference, just cutting the split ends off and putting some layers back into it, but I like it.


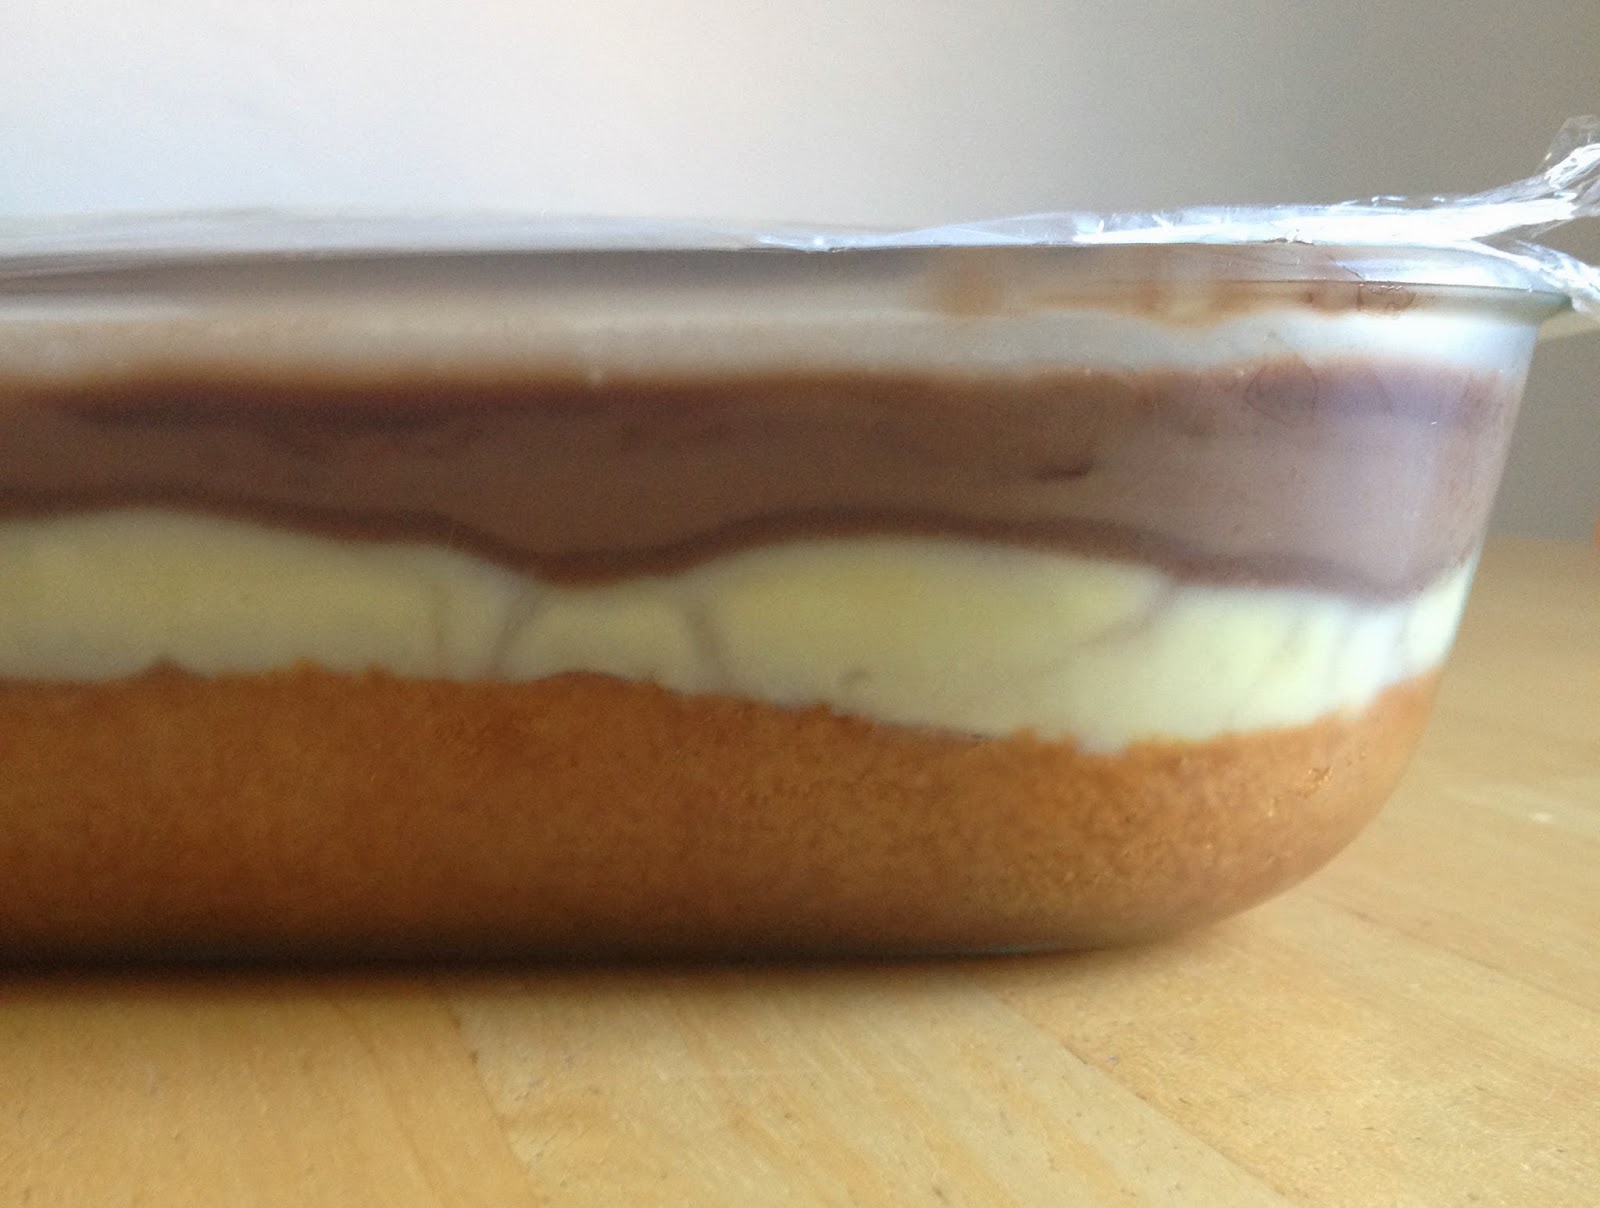
Saturday, I made this baby for our Easter get together at some friends'.  Boston Cream Poke Cake.  Oh yum!  This is one of my favorite cakes, and it's so incredibly easy to make!  Just bake a yellow cake, poke a ton of holes into it, pour on vanilla pudding and then cover with chocolate ganache!  So, so, so good!  Except for the fact that we brought way too much back home with us!  Now I'm going to have to get fat or find someone to help us eat it!

And lastly, I did some idle shopping on Saturday afternoon and came up with a great project to add some more coral to the bedroom!  The best part: for this project, I spent a total of $6!!!  Sunday, I put it all together, and voila cute bedroom wall art!


It all started as I was strolling through Michael's with no intention whatsoever except to take up some time.  I happened upon the scrapbook papers and found some adorable sheets that matched my coral pillow exactly!  (And how did I know they matched exactly?  I now carry a swatch of that fabric in my wallet so that I can pull it out anywhere, anytime if I find something coral.)  The 12x12 sheets were only $.59 a piece!  So, I continued strolling through the store while I let the ideas formulate in my head.  I ended up with two corals and two grays.  Then I headed across to the dollar store to grab some $1 8x10 frames.  Print and cut out some letters, put it all together, and here's what I got!


I just L-O-V-E it!  Haha!  And I loved the $6 price tag even more!

Well, that about brings you up to speed on my life!  I did start a new running program today, but I'm not quite ready to share it with anybody because I'm pretty sure I'm going to fail miserably at it.  (It looks really hard.)  But, I will maybe share it in a few weeks if it hasn't killed me by then!

I hope you find a few little lovelies in your own life to get you through Monday!

Wednesday, April 16, 2014

Peanut Butter Cookies for One


O. my. goodness.

Last night, I found myself at home alone (which is not normal for the evenings).  And as I was sitting around doing very little of anything, I suddenly needed some peanut butter cookies.  I love peanut butter cookies.  And they're never a cookie Thomas would choose to eat.  Sure, if I make them, he'll probably break down and have a few just because they're there.  But, usually, peanut butter cookies are all mine to eat.

So this recipe is absolutely perfect for me!  It's a single serving cookie recipe.  And, I've done some single serving desserts previously (check out the Recipe Index), but never a traditional cookie, baked-in-the-oven, recipe.


These cookies were perfect!  Seriously.  They tasted amazing and were so soft and moist that they just fell apart in my hands and melted in my mouth.  Depending on what size you make your cookies, you could get anywhere from 2 to 10 cookies from this recipe.  Yes, it's a "single serving" recipe, but if you know what's good for you, you probably shouldn't eat all of the cookies in one sitting.  (Apparently I don't know what's good for me.)  But, oh, it was worth it!

This recipe comes straight from No. 2 Pencil, and she has several single serving recipes of all different varieties.  And if you're into these types of recipes, you should definitely check out the blog.  I have yet to try one of her single serving desserts that I did not like!  You go, girl!


Peanut Butter Cookies for One
From: No. 2 Pencil
Makes: 2-10 cookies depending on size

Ingredients:
2 tablespoons butter
3 tablespoons brown sugar, packed
Pinch of salt
1/4 teaspoon vanilla extract
2 tablespoons peanut butter
1 egg yolk
1/4 teaspoon baking soda
1/4 cup + 1 tablespoon all-purpose flour

Directions:
  1. Preheat oven to 350 degrees, and line a baking sheet with parchment paper.
  2. In a small bowl, microwave butter until softened (a little melted is fine).
  3. Stir in brown sugar, salt, and vanilla.
  4. Add peanut butter, and stir until combined.
  5. Separate the egg white and yolk, and stir in only the yolk.
  6. Add the baking soda and flour, and stir one final time.
  7. Using your hands, roll the dough into as many cookies as you like and place them on the parchment-lined baking sheet.  Flatten slightly with a fork.
  8. Bake for 8-10 minutes, until the edges start to turn golden brown.
  9. Remove cookies to a cooling rack to cool.
  10. Enjoy with a glass of milk for dipping!  Yummy!
Ooh, I could make these again right now.  But, since it's ten in the morning, I guess I will refrain!

Monday, April 14, 2014

Buttercream... Buttercream...


(I almost can't say this word without thinking about that scene from Rush Hour 2 "... buttercream, buttercream, croc skin, buttercream...")

This is a lovely little recipe for a killer butter cream frosting!  My mom makes a fabulous cake icing that is so rich you need a glass of milk with it.  And it has been my go-to icing recipe for a long time.  But, for piping cupcakes, it's a little too rich and heavy.

So, I hopped on Pinterest the other night when I needed a fluffier recipe, and I had some very strict criteria.  Turns out I only had one stick of butter and half a bag of powdered sugar, and my cupcakes needed iced immediately, so no last minute store runs.

After a little searching, I came across this recipe several times from different people, and the photos made it look like the type of icing I was looking for.  And mainly, it met my butter and sugar limitations.  But it turned out to be a really great icing recipe!

This icing was thick and creamy.  It piped on and held its shape really well.  And most importantly, it tasted great but wasn't so powerful that you completely lost the flavor and goodness of the cake underneath of it.

If you're looking for an easy and delicious buttercream recipe, this is it!


Vanilla Buttercream Icing
Will ice 24 cupcakes

Ingredients:
1 stick (1/2 cup) butter, room temperature
4 cups powdered sugar
1 teaspoon vanilla extract
2 tablespoons milk

Directions:
  1. Let the butter come completely to room temperature before starting.  No microwaving it to speed up the process.  You want it softened, not partially melted.
  2. Using an electric mixer, whip the butter for about one minute.
  3. Add the powdered sugar, vanilla, and milk.  Begin by mixing on a slow speed (just so you don't zing powdered sugar all over your kitchen), then increase the speed.
  4. Continue mixing until all ingredients are completely incorporated and the icing is smooth and evenly textured.
  5. Pipe or frost as desired!
  6. If you know what's good in life, you'll also add sprinkles!  :) 
Biting into one of these cupcakes was definitely a little slice of contentment!

Saturday, April 12, 2014

February/March Movie Reviews

So I have not yet filled you in on the rest of the movies we saw in February and March even though we're halfway through April!  I am slackin'!

We ended up seeing five of the ten movies that I mentioned in this post describing the movies I was interested in seeing back in January.  We hardly ever see all of the movies on the list because, well, mainly because we don't have that much money to spend on movies every month.  But also because I a lot of times include movies that I'm pretty sure we won't see in theaters but I'm still interested in.

Below are the three movies we saw in February and March along with a sneak peek of one of the April movies we saw this week!  We still have not seen Noah.  And yes, I've seen everyone and their mother's opinions of it on the internet, but I would still like to see it with my own eyes to form my own opinions.  However, that will probably happen via Redbox in a few months.

Monuments Men - I really, thoroughly enjoyed this movie.  I'm a huge history nerd, so I'm pretty apt to like most things that have a good historical background.  However, I feel as though the movie was marketed as a comedy as well as a true story.  It was not a comedy.  The funny parts of the movie were all in the previews.  What I did not expect was to be moved by the events.  I teared up several times (call me crazy), but the things that were done during the Second World War are still so emotional.  And if this movie had been about the horrors of the Holocaust or the battlefields, I would have expected to be moved.  But this movie was *just* about art.  And yet it was so sad and moving.  But, like I said, this movie was very little of what I expected, but I enjoyed it extremely and would recommend it to everyone.

300: Rise of An Empire - Blech.  I loved the first 300 movie.  And because of that and the fact that this sequel did not have a cast that packed as much punch for me, I did not have incredibly high hopes for this movie.  And still, it did not live up to those low expectations.  I was bored.  There was so much backstory intent on educating the viewer of the character history that the actual plot only really took up half of the movie.  Much of the screen time was narrated and was only backstory given so that you could understand why everybody hated everybody.  Also, the first movie stuck a lot closer to actual historical events than this one.  Sure, they both have tons of made-up stuff in them, but this movie was almost totally mythical and unfathomable.  I did not like it and would not recommend it.

Divergent - This movie surprised me.  From seeing the various trailers, I went into it knowing that it was going to be very different than the book.  But I still really, really liked the movie.  They definitely changed a lot of things, but I didn't mind most of them.  I'm not really sure what you'd think of it if you haven't read the books.  I would say that they're pretty similar to The Hunger Games.  So, if you like The Hunger Games books or movies, there's a good chance you'll like these.  My main issue with this movie was the casting.  I liked some of the cast members and completely disliked others because I felt like they were nothing like the book versions.  However, if you're into this popular teen/post-apocalyptic/strong-female-lead stuff, you should definitely give this movie a shot.

Here's the April sneak peek!  We had an impromptu date night on Tuesday with Captain America and $2 popcorn/fruit snack/soda boxes at the movies!
Captain America: Winter Soldier - I knew I was going to like this one, and I did.  I love all of the Marvel universe films so far, and I was pretty darn sure that this one would be the same.  However, the Captain America plots are moving a little more towards the "typical trilogy" area in that, the plot of this movie is pretty closely related to that of the first one.  And I have a feeling that Captain American 3 (in May 2016) will continue with this plot line.  Of course, all of the movies are related, but these seem to be a bit more so than the others.  Like I said, I definitely liked it, and, just like all of the other Marvel universe movies, it will not disappoint.

Next up on the list: probably The Amazing Spider-Man 2.  (Though I am still so much more excited for X-Men: Days of Future Past.)

Happy movie watching!

Wednesday, April 9, 2014

One Hour to Delicious Soft Pretzel Bites


Yum!  Really.  These pretzel bites are the perfect treat for a Saturday afternoon or a night at home with a movie.  They're ready in under an hour and really easy to make.  What more could you ask for in a home-made snack?!

You can change your toppings to suit your every whim.  If you like your pretzels salty with some cheese sauce or mustard, you got it!  For all you sweet tooth's out there, try cocoa or cinnamon sugar.  I tried out a cinnamon sugar mixture and a cocoa and sugar mixture.  Then the hubs and I chowed down on these with some Oreo Filling Dip.  Yum yum yum!


One Hour Pretzel Bites
Adapted from: Averie Cooks
Makes: about 30 small bites

Ingredients:
1 1/4 teaspoon active dry yeast
3/8 cup (1/4 cup + 2 tablespoons) warm water
1/2 teaspoon granulated sugar
1 cup all-purpose flour
1/4 teaspoon salt
1/2 tablespoon canola/vegetable oil
2 tablespoons butter, melted (for brushing)
Optional Toppings:
Kosher salt and mustard or cheese sauce
3 tablespoons granulated sugar + 2 tablespoons cinnamon
3 tablespoons granulated sugar + 2 tablespoons cocoa powder

Directions:
  1. Begin by proofing your yeast.  Stir together the yeast, sugar, and warm water in a small bowl or measuring cup.  Let it sit for 10 minutes.  (If the yeast foamed up and about doubled, you're ready to move on.)
  2. Stir together the yeast mixture, flour, salt, and oil.  Knead for about 5 minutes either by hand or with a stand mixer.  The dough will be firm and smooth.
  3. Divide into two lumps and using your hands, roll each one out into a long rope (about the length of your cookie sheet).  No need to flour the counter for this step.  Then cut each rope into 1 inch sections.
  4. Place on a cookie sheet lined with parchment paper or sprayed with cooking spray.  Make sure none of the bites are touching.
  5. Preheat your oven to 350 degrees and allow the bites to rest on the stove while the oven is warming up.
  6. Bake for about 16-18 minutes, until the pretzels are just barely starting to brown.  You don't want to over cook them because the will turn out hard.
  7. While the pretzels are in the oven, melt the 2 tablespoons of butter and prepare your toppings.
  8. When the pretzels come out of the oven, brush them generously with butter and top with your desired toppings.  *An easy way to top these is to place your topping in a large baggie, then throw the bites into the baggie and shake it all up.
  9. Enjoy!  Store any leftovers in an airtight container.  Before eating leftovers, place in microwave for about 15-30 seconds to warm and soften them.  Eat within two days.
 

Monday, April 7, 2014

Florida is the Best

It's true.  My little lovely today centers on the fact that living in Florida rocks!  I love it.

Yesterday, our life group spent the evening together on an island in the Indian River.  We hung out, explored the island, played games, built a campfire, MADE S'MORES!  It was a blast to hang out with the group in such a unique setting.  And the weather could not have been more perfect.  It wasn't too hot, wasn't too cold, and we got to see a beautiful sunset while we were there.  A really great day!

Here are some photo highlights!
Happy Monday!

Friday, April 4, 2014

New Purple Scarf

This week has been rough for me.  Nothing big.  Just a week full of small tough moments.  

And it all culminated this morning with the discovery that if you mess up my breakfast, you have messed up my entire day.  Yep.  I've been craving waffles all week.  And the plan was to make them for breakfast this morning so that Thomas could help me eat them (I try not to fix them just for myself because that would cause severe over-eating for me).  Well, too bad I tried a healthier recipe.  I ended up with a completely unusable waffle maker filled with inedible waffle-ish-ness.  

So, of course, I dejectedly grabbed a bagel from the freezer and popped it into the toaster instead.  ONLY to have the bagel burn to a crisp because the toaster decided not to pop up like it's supposed to!  While I had decided to give up on the world and go hide in a hole for the rest of the day, Thomas promptly grabbed another bagel and popped it into the toaster for a second go round.  

Nothing disastrous happened for the rest of breakfast, but I did have to spend the next 45 minutes cleaning out a waffle maker that is so stupidly designed that you can't take it apart to clean it.  So 45 minutes, some sore fingers, and about a million paper towels later, I shoved the (mostly) clean waffle maker back in its cabinet before I lost control and threw it in the trash instead.

So yeah, there's a peek at my day.  Moral of the story: Don't EVER mess with my breakfast!  Mer.

Anyway, I just meant to explain that I've been a little absent on the blog because I've had a bad week.  It's a lot harder to write upbeat posts when I'm feeling melancholy.

But I was reminded yesterday (just in time too), that God does not want his children to feel defeated and beat down.  Yes, He allows us to go through hard times, but the illusion of defeat comes straight from the enemy, not from God.  So, I am praying a lot and trying to keep my head up instead of succumbing to the feelings of failure.

Moving on... This post is really supposed to be about the scarf I recently finished, but I obviously got sidetracked.  (Thus explaining why I don't like to blog when I'm having a bad day/week.)

This is the scarf that's been on my loom since just before Christmas.  I started weaving with a light pink weft (sideways) yarn, got about halfway done, and then didn't touch it for about three months.  I stopped working on it because I really wasn't liking the color scheme.

One day, I decided that I didn't want to finish another scarf that I knew I wouldn't like, so I un-wove the entire thing and started again with a purple weft.  And I love the colors so much better.  Even though it was a pain to un-weave so much of a project, it was definitely worth it!  Here's the finished result!
I haven't started on a new project yet, but I'm sure I will soon!

Tuesday, April 1, 2014

A Few DIY Projects with a Yard of Fabric

So, Thomas and I bought a new bed in January of last year.  Our old bed was worn out because we didn't have the money to buy a good one when we got married.  So, we saved up a little extra money so that we could upgrade to a king-size bed.  Awesome!

Of course, changing the size of the bed meant that we had to change the comforter, etc.  So this was my chance to redo all of the colors in our bedroom.  I was ecstatic!  I love decorating and picking out colors and painting (even though we're not painting the apartment we live in now).

I decided that I wanted to go with a neutral bedding set (black, gray, white) and then add in accents of coral.  I thought that this would be a cool idea so that I could pretty cheaply give our room a face lift by changing the accent color in the future without having to splurge to buy an all new comforter set, sheets, etc.

Here's where the problem comes in... I picked coral.  In fact, I became married to the idea that I wanted coral accents.  And well, I'm a little picky about my color of coral.  It can't be too orange or too pastel.  And the other colors in the fabric must be gray, white, or black.  And as you might know, that's a pretty tall order to fill.  But I had pretty much the perfect color of coral in my bridesmaid dresses for my wedding, so I knew exactly what I wanted!

So for the past year and few months, we've had no coral accents in our room.  It's true that I have found several coral things that I liked, but I'm just not willing to pay $60 for a stinkin' decorative pillow.  Really, my budget has been quite minimal, so my mom inspired me to get my craft on.

While she was here, we spent the last day of her visit shopping.  We'd been looking for something coral just about everywhere we went with no luck.  But, our last stop was Hobby Lobby (I love that store!), and we (my mom) happened to spot some perfect coral and white fabric!!!

So, with her ideas flowing, we snatched it up and grabbed a couple of bags of "fiber-fill".  Add in some cute black buttons and a little bit of adorable ribbon, and here's the result.  (I still have quite a bit of fabric left, but I'm not quite sure what I want to do with it yet.)
The plan was to make a cute little decorative pillow for the bed, and here it is.  A couple of seams on the outside, some stuffing, and the final closing stitches, and I was done.  For a little extra something, I grabbed the cute black buttons on sale at JoAnn's.
We had only bought a yard of fabric, but I still had so much left, so I decided to use an old picture frame to make a little bulletin board.  I just cut the fabric to the right size, wrapped it around the picture frame and used a regular old stapler to staple it on the back.  Finally, I snazzed it up with some absolutely adorable ribbon (also from JoAnn's).
It makes the perfect little photo board.

Woohoo for DIY!  I made both of these items (with fabric and pillow filling to spare) for less than $20!  Just imagine the possibilities when you decide to try something out for yourself!