So, today made the sixth day in a row that I have run!!! Woot woot! I feel like a rock star even though I know my feat is small and mostly unimportant. But, yay for me!
Also, tomorrow I am making THREE new recipes! I can't wait to try them out and let you know what I think. It's really quite terrible though because we still have cheesecake in the house. And I'm very much enjoying it, but I just need variety in my life! So, I'll be making some peanut butter chocolate chip cookies (that are flourless... interesting), a cream cheese berry cobbler, and some healthy oatmeal cinnamon raisin muffins! I can't wait!
But first... I have to make it through the work day tomorrow. Thank the good Lord for jeans Fridays! That is one of the many blessings for which I am infinitely thankful! I'm also incredibly thankful for my kitchen, small and poorly stocked as it is, at least I have one to use and to make all these wonderful treats in! (I'm secretly (though not so secretly now that I'm telling all of you...) hoping and praying that God would just let me bake for the rest of my life. Wouldn't that be just lovely?!)
Have a great night! Happy almost weekend!
I kept that pretty short, didn't I?! Kudos to me! ;)

Thursday, February 28, 2013
Tuesday, February 26, 2013
95 Calorie Banana Muffins!!!
Hey guys! I am pumped! Last night, I had a couple of bananas sitting on the counter top that were going bad, so I needed to make some banana bread. But alas, we are on a "diet", and banana bread pretty much kills it.
So, I've been toying around with using substitutions for regular ingredients in baking and had even printed some healthy versions of recipes from Pinterest to try. But, I hadn't found a "healthy" banana bread recipe.
What did I do then?! I made my own!!! Aaaahhhh! I've never created a recipe before (I certainly did not go to school to be a chef or anything), so this was a thrilling experience for me. I was so nervous and excited that I actually burnt my fingers trying to unwrap and eat a muffin that had literally just come out of the oven. I just couldn't wait to taste them and see if my recipe had worked or not! IT DID! *Cue dancing around the kitchen like a crazy person.*
And honestly, I was so nervous because I figured they would end up tasting funny, but I really don't think I could tell the difference between this version and the full fat with much more butter and sugar! Wow!
So, I can not keep this wonderful recipe a secret! Here it is:

 95 Calorie Banana Muffins
Makes 20 regular size muffins
Ingredients:
2 c. all purpose flour
1 tsp. baking soda
1/4 tsp. salt
2 1/3 c. mashed, over ripe banana
1 tsp. vanilla
2 eggs
1/2 c. brown sugar
1/2 c. unsweetened applesauce
Directions:
Have a great night!
So, I've been toying around with using substitutions for regular ingredients in baking and had even printed some healthy versions of recipes from Pinterest to try. But, I hadn't found a "healthy" banana bread recipe.
What did I do then?! I made my own!!! Aaaahhhh! I've never created a recipe before (I certainly did not go to school to be a chef or anything), so this was a thrilling experience for me. I was so nervous and excited that I actually burnt my fingers trying to unwrap and eat a muffin that had literally just come out of the oven. I just couldn't wait to taste them and see if my recipe had worked or not! IT DID! *Cue dancing around the kitchen like a crazy person.*
And honestly, I was so nervous because I figured they would end up tasting funny, but I really don't think I could tell the difference between this version and the full fat with much more butter and sugar! Wow!
So, I can not keep this wonderful recipe a secret! Here it is:

 95 Calorie Banana Muffins
Makes 20 regular size muffins
Ingredients:
2 c. all purpose flour
1 tsp. baking soda
1/4 tsp. salt
2 1/3 c. mashed, over ripe banana
1 tsp. vanilla
2 eggs
1/2 c. brown sugar
1/2 c. unsweetened applesauce
Directions:
- Preheat oven to 400 degrees. Grease and flour two regular sized 12-cup muffin tins. (You can use paper baking cups, but I had a little trouble with the muffins sticking to them because they're so moist. They're fine to use though, if you don't mind peeling the cups off carefully.)
- Combine mashed banana, vanilla, eggs, brown sugar, and applesauce in a mixing bowl. Mix well by hand.
- Add in flour, baking soda, and salt. Stir until just combined.
- Use a 1/4 cup measuring cup or an ice cream scoop to fill 20 muffin cups about 2/3 full. (These worked out to a pretty regular sized muffin.)
- Bake at 400 degrees for 15-18 minutes or until just browning on top.
- Enjoy your pretty healthy, delicious treat!
Have a great night!
Monday, February 25, 2013
Lundi Little Lovelies: Stationary and Running(?!)
Oh, I have had a wonderful, wonderful day! How about you?
I know, I'm bragging a little bit because I didn't have to work today, so I am sorry for those of you who had real responsibilities today.
But, I am going to try to keep this post short! (I really struggle with that... have you noticed yet?!)
Here is my little lovely for today.

I found these cards today and couldn't resist buying them. (They're Hallmark brand, and I found them at Walmart.) I love to write (obviously). Most of the time, my thoughts just come out better in writing than they do in speech, so I've really been wanting to get some cute cards to write little notes to people. So, yay!
Also, little lovely #2: Thomas and I ran (jogged) yesterday and today too! Woot woot! If you had told me a month ago that I'd be choosing to run and that I'd be enjoying it, I probably would have laughed in your face. But, I really am enjoying it! (Mostly I just really love that it lets me eat more too!)
So, lovely Mondays without work. *Sigh* This week at work is going to be crazy, but I'm looking forward to it because my schedule is all messed up, and I always enjoy a little change!
I hope your lundi was as lovely as mine!
I know, I'm bragging a little bit because I didn't have to work today, so I am sorry for those of you who had real responsibilities today.
But, I am going to try to keep this post short! (I really struggle with that... have you noticed yet?!)
Here is my little lovely for today.


I found these cards today and couldn't resist buying them. (They're Hallmark brand, and I found them at Walmart.) I love to write (obviously). Most of the time, my thoughts just come out better in writing than they do in speech, so I've really been wanting to get some cute cards to write little notes to people. So, yay!
Also, little lovely #2: Thomas and I ran (jogged) yesterday and today too! Woot woot! If you had told me a month ago that I'd be choosing to run and that I'd be enjoying it, I probably would have laughed in your face. But, I really am enjoying it! (Mostly I just really love that it lets me eat more too!)
So, lovely Mondays without work. *Sigh* This week at work is going to be crazy, but I'm looking forward to it because my schedule is all messed up, and I always enjoy a little change!
I hope your lundi was as lovely as mine!
Double Breaded Chicken Parmesan
Here's a recipe that my wonderful hubby came up with, and it turns out that he is a GENIUS!!! This chicken parmesan is perfect, and it's really not that complicated to make. It is also super easy to make it your own by adding in your favorite seasonings.
(The shortened version is at the bottom!)
First off, we're only a family of two, so I half almost every recipe I make, so with the recipe and ingredients I use, it will serve 2-4 people. But, you can double it as much as you need for your family size.
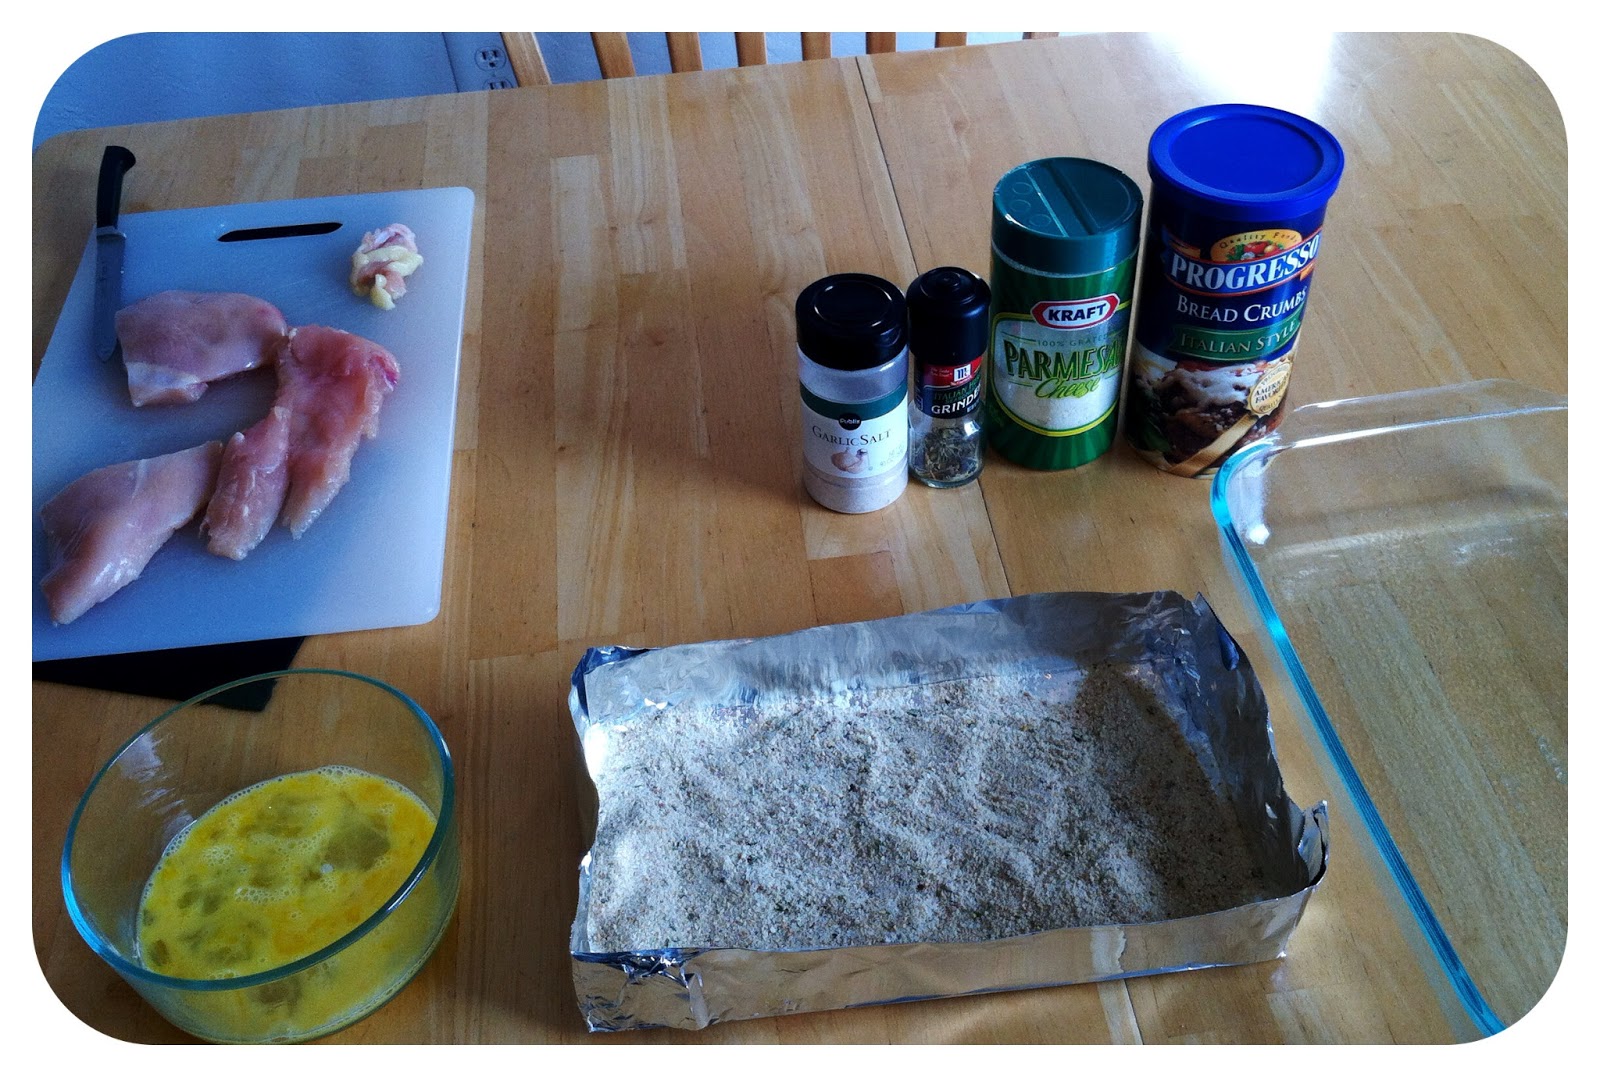
Here is what you'll need:
 Here is my breading line. It's good to have everything close together because it can get messy with the egg and breading. First prepare your breading. About 1-2 cups of bread crumbs, sprinkle in some parmesan and your other seasonings and mix it up a bit.
So, cut your chicken into smaller pieces. I attempted to filet it but was only partially successful. The top ended up bigger than the bottom, so I cut the top in half again.
Then, dip each piece into the scrambled egg. Make sure it's well-coated. Then dip it into the breadcrumb mix. Make sure it gets well-coated here too. In my opinion, the more breading, the better!
Then, repeat. Dip it into the egg again and then breadcrumbs again. We found that double breading the chicken adds so much more flavor, and it really locks in the juice of the chicken so it doesn't dry out in the oven.
Once you've got two thick layers of breading, lay the chicken in the prepared glass dish.
 Bake the chicken at 400 degrees for about 20-30 minutes, flipping each piece about halfway through. The baking time really just depends on the size and thickness of your chicken pieces. Since I fileted it, the baking time was about 20 minutes, but it may take longer in your oven or with thicker chicken. The best way to be sure is just to cut one of the thickest pieces open and make sure it's done inside.
Once the chicken is cooked all the way through, pop it out of the oven, and turn on your broiler. Cooking each side with the broiler helps to make the breading that little bit crispier. Once the broiler is on, pop the chicken in for just a minute or two, just until it starts browning slightly. Then, take it out, flip the chicken and repeat with the other side. *The second side always cooks faster as the broiler continues to heat up, so seriously, it takes like 30 seconds to a minute.
After broiling both sides, take it out again, and add some sliced cheese on top. Pop it into the oven just one more time, for a minute or two, just to melt the cheese.
So, here's the finished product, just out of the oven.
 And finally, serve with your favorite pasta and sauce. Thomas requested angel hair pasta for his birthday. And I served it with some Peasant Bread that I found on Pinterest. *Also, it really bothers me that you can't see anything green in this picture, but we have salad just off to the side! ;)
 So there you go! Delicious chicken Parmesan in less than an hour!
Here's the concise version!
Double Breaded Chicken Parmesan
Ingredients:
1-2 chicken breasts, fileted or cut into smaller pieces
1-2 cups Italian bread crumbs
Grated Parmesan cheese
Italian seasoning, optional
2 eggs
2-3 slices mozzarella cheese
Pasta and pasta sauce of choice
Directions:
(The shortened version is at the bottom!)
First off, we're only a family of two, so I half almost every recipe I make, so with the recipe and ingredients I use, it will serve 2-4 people. But, you can double it as much as you need for your family size.
Here is what you'll need:
- One big or two small chicken breasts, fileted or cut into smaller portions (the thinner they are, the faster they'll cook)
- 2 eggs, slightly scrambled
- Seasoning: Italian bread crumbs, paremesan cheese, any other seasoning you want to use (we have this fabulous "Italian Grinder" that I love because it adds just a little spice)
- A large glass pan, greased with cooking spray (I used my 9x13 here)
- Several slices of mozzarella (or any Italian) cheese.
So, cut your chicken into smaller pieces. I attempted to filet it but was only partially successful. The top ended up bigger than the bottom, so I cut the top in half again.
Then, dip each piece into the scrambled egg. Make sure it's well-coated. Then dip it into the breadcrumb mix. Make sure it gets well-coated here too. In my opinion, the more breading, the better!
Then, repeat. Dip it into the egg again and then breadcrumbs again. We found that double breading the chicken adds so much more flavor, and it really locks in the juice of the chicken so it doesn't dry out in the oven.
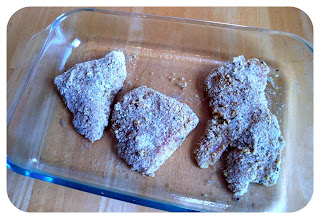
Once you've got two thick layers of breading, lay the chicken in the prepared glass dish.
Repeat with all of your pieces of chicken. Here's mine, all ready to go!

Once the chicken is cooked all the way through, pop it out of the oven, and turn on your broiler. Cooking each side with the broiler helps to make the breading that little bit crispier. Once the broiler is on, pop the chicken in for just a minute or two, just until it starts browning slightly. Then, take it out, flip the chicken and repeat with the other side. *The second side always cooks faster as the broiler continues to heat up, so seriously, it takes like 30 seconds to a minute.
After broiling both sides, take it out again, and add some sliced cheese on top. Pop it into the oven just one more time, for a minute or two, just to melt the cheese.
So, here's the finished product, just out of the oven.


Here's the concise version!
 Double Breaded Chicken Parmesan
Ingredients:
1-2 chicken breasts, fileted or cut into smaller pieces
1-2 cups Italian bread crumbs
Grated Parmesan cheese
Italian seasoning, optional
2 eggs
2-3 slices mozzarella cheese
Pasta and pasta sauce of choice
Directions:
- Preparation: Pour bread crumbs, parmesan cheese, and seasoning into a small pan and mix. Crack two eggs into a flat-bottomed bowl and scramble slightly. Spray a glass baking dish with cooking spray. Preheat oven to 400 degrees.
- Dip a fileted chicken breast piece into the egg and coat well.
- Dip into bread crumbs and coat.
- Repeat, dipping the same piece into the egg again, and then into the bread crumbs again. Make sure it is well-coated each time.
- Place the chicken into the prepared baking dish.
- Repeat for all pieces of chicken.
- Bake in a 400 degree oven for 20-30 minutes (depending on thickness of chicken), flipping each piece about halfway through. *To make sure the chicken is fully cooked, cut into the thickest piece to check and see if it's done.
- When chicken is fully cooked, remove it from the oven, and turn the broiler on.
- Place chicken in the oven to broil until just starting to brown. Flip chicken and repeat.
- When both sides are slightly brown, remove and top with sliced mozzarella cheese. Place it back in the oven until the cheese is just melting.
- Serve with your desired pasta and sauce! Yum!
Sunday, February 24, 2013
Sunday Funday: Homemade Cheesecake and First World Problems

I do like that I went with a plain cheesecake recipe because now that I know what I'm doing, I feel like I could spice it up next time with some add-ins or maybe make a smaller cheesecake (maybe an 8") and use the leftover batter for personal cheesecakes in muffin cups! The possibilities are endless!!!
So, I originally found this recipe through Pinterest, and I didn't change much from the original recipe posted by Katy on "Food for a Hungry Soul". Katy also listed that the recipe came from Jim Fobel's Old Fashioned Baking Book.
So, here's my FIRST cheesecake saga! Enjoy!
First off, you have to let 5 eggs, 4 bricks of cream cheese, 1 stick of unsalted butter and 2 cups of sour cream sit out to reach room temperature. Boy, was that torture! On the upside though, I was smart enough to make a little fort out of the cream cheese and butter and put the eggs in the middle so they wouldn't decide to hop onto the floor while I wasn't looking!
After about a million years, you can then start creaming things together. Eggs and sour cream in the BIGGEST mixing bowl you own. And cream cheese and butter in the SECOND BIGGEST bowl you own! Seriously, I thought all of this stuff was going to overflow my enormous bowls. Then, when you've beat these two sets of ingredients, add the cream cheese mixture to the sour cream and egg mixture, and beat it to perfection!

Then, you're almost there! Make sure your oven is preheated to 300 degrees Fahrenheit. And here's the hard part. Wrap your 10" springform pan in two layers of aluminum foil to try and prevent water from seeping in. You'll also have to have a huge pan ready for the water bath. The pan needs to be big enough that the springform pan doesn't touch the sides. I bought a big disposable roasting pan to use because I don't have any pans that big.
So, now, pour the cheesecake filling deliciousness into the springform pan, and place the pan in the roaster. Then, put the whole thing in the oven and pour very hot tap water into the roasting pan until it reaches halfway up the springform pan. Once it's in the oven, if you're one of those adventurous people, lick the bowl. Yuuuuuuuuuummmm!


I also made a blackberry sauce to go with it. Delish!
So here's my slightly altered version of the recipe.
 New York Cheesecake
Adapted from: "Food for a Hungry Soul"
Ingredients:
5 large eggs, room temperature
2 cups sour cream, room temperature
4 8-ounce packages cream cheese, room temperature
8 tablespoons unsalted butter, room temperature
1 1/2 cups sugar
2 tablespoons cornstarch
2 1/2 teaspoons vanilla extract
Directions:
- Lay out the eggs, sour cream, cream cheese, and butter and allow them to reach room temperature. Wrap a 10" springform pan in two layers of aluminum foil.
- When the ingredients are at room temperature, preheat your oven to 300 degrees. Then, cream the eggs and sour cream together with an electric mixer in a very large bowl.
- In another bowl, beat the cream cheese and butter together until well combined and creamy.
- Next, add the cream cheese and butter to the egg and sour cream mixture. Beat these together until creamy, no lumps allowed.
- Last, add the remaining ingredients: sugar, cornstarch, and vanilla, and beat until well combined.
- Pour the filling into the springform pan. Put the cheesecake pan into the roasting pan and put the whole thing in the oven.
- Pour very hot tap water into the roasting pan until it's about halfway up the cheesecake pan.
- Bake for 2 hours to 2 hours 15 minutes, and keep an eye on it to make sure the top doesn't become over brown.
- When its lightly brown on top, take everything out of the oven. Be really careful when removing the springform pan from the water bath because the water is super hot. But, remove the springform pan and take the aluminum foil wrap off.
- Allow the cheesecake to cool at room temperature for 4 hours. Then pop it into the fridge to chill for as long as possible. 12 hours seemed to be a good amount of time.
- Try not to eat the entire thing in one sitting!
*** This makes about 1/4 cup of sauce, which is not much, but it was good for us since we gave a lot of the cheesecake away to friends too.
- Add several tablespoons of sugar to about 20 blackberries and mash the whole thing together a little bit. Then let it sit for a while, half an hour is a good amount of time.
- Then boil the mixture in a small sauce pan. Allow it to boil just a bit to help combine and thicken. Stir continually and continue to smoosh the blackberries around.
- Push everything through a strainer to keep all of the seeds out of the sauce.
- Drizzle over your scrumptious cheesecake.
So... now to the other part of Sunday Fun day! I thought we could all use a little of the silly things all over the internet that make us laugh. And, one of the silly things that makes me laugh is the popular meme of "First World Problems". They are hilarious because they're so true. And though they make me laugh, they also remind me of how blessed I am, and how I should be more thankful for everything I have. So, here is a first world problem!

 Just a funny reminder that we should be much more thankful for all of the wonderful blessings God has given us. Wherever you are, the fact that you have the ability to read this post means that you are incredibly blessed.
Have a wonderful night!
Saturday, February 23, 2013
What a Weekend!
How's your weekend going?!
Mine is GREAT!!! I have been so incredibly productive in the last 28 hours that I had to make a list of things I wanted to blog about!
So, tomorrow is Thomas' birthday, but since Sundays are pretty busy for us, we spent most of today celebrating! And hey, why wait until your actual birthday when you could celebrate for a whole weekend?!
I have been contentedly stuck in the kitchen the past two days. So, here's the rundown of my weekend so far:


Sewed a dress! Pics to follow.


New bread recipe from Pinterest!
Mine is GREAT!!! I have been so incredibly productive in the last 28 hours that I had to make a list of things I wanted to blog about!
So, tomorrow is Thomas' birthday, but since Sundays are pretty busy for us, we spent most of today celebrating! And hey, why wait until your actual birthday when you could celebrate for a whole weekend?!
I have been contentedly stuck in the kitchen the past two days. So, here's the rundown of my weekend so far:

First homemade cheesecake with fresh blackberry sauce! Click here for the recipe!

Two chicken casseroles (one for us and one for a friend)!
Sewed a dress! Pics to follow.

One of the hubby's faves for breakfast, Chocolate Chip Muffins!

Delicious Chicken Parmesan for dinner tonight (Thomas' favorite and his own recipe)! You can find this recipe here.
New bread recipe from Pinterest!
AND... perhaps one of the most interesting things: I ran this morning. And nothing life threatening was chasing me. How 'bout that?! (FYI, I don't run. Period. The last time I ran was in an airport when I was trying to make a flight. And I can't even remember the time before that.) So, I felt all healthy and awesome today!
So, I've got some recipes to share with you! Check back for them soon!!!
Happy Saturday. Now back to hanging out with my birthday boy! :)
Wednesday, February 20, 2013
Wednesday Wins: Houses and Birthdays
So, it's Wednesday, officially the middle of the week! Whew! Thank goodness because I am pooped!
Instead of dwelling on all the negatives (aka, all the areas I'm failing at being content), let's talk about some victories! In our small group Bible study, we are doing a study called "Better Together" by Rick Warren (author of The Purpose-Driven Life). And this week, he said two things that really stuck with me. He was talking about 1 Corinthians 13 (the "Love" chapter), and it says that love always hopes. And he used an acronym for "hope" that I really liked: "Holding On Praying Expectantly". That's a great way to describe hoping; praying expectantly and holding on when you don't know what's going to happen. Because, really, we never know what's going to happen. No one knows what God is about to do in their life, maybe even tomorrow. So, I am going to hold on a pray expectantly while I'm working on being content.
The other point he made was that loving someone means we rejoice in their victories. And that really hit home with me, because that's something God has been working on in me. You see, one of my best friends just finished building her dream home! And it is GORGEOUS!!! The first time she took me to see it, I was really, really struggling with discontent and jealousy. It didn't matter that she's been married twice as long as I have or that she and her husband have worked really, really hard to be able to build their dream home. These thing didn't matter, because, when that little discontentment bug weasels into your life, details don't matter. Nothing is fair. Period. And it took some time and prayer for me to get over it and be happy for her. But, God helped me past that struggle, and let me tell you, it has been soooooo rewarding to help her move into her new home and really, truly, honestly be insanely excited for her. (And it does help that she's going to let me come over and bake with her in her AWESOME new kitchen!) It has been so freeing and so wonderful to rejoice in her victory. I hope you can find an area in one of your loved ones' lives to do the same.
Also, a small victory for me tonight: Thomas' birthday is on Sunday, and I love trying to spoil him. (I say 'trying' because I'm not very good at it.) But, tonight, after a full day's work, I was not excited to go run around town to get all of his presents and stuff. But, I did, and there's something wonderful about a small accomplishment wrapped up in pretty paper and bows! Yay!!! (Now I just can't wait for Saturday and Sunday when we get to celebrate!!!!!!)
 I will also be making my first homemade cheesecake this weekend for his birthday dessert, and I just can't wait to try it and tell you how it turns out!!!
So, now, I'm off to go make some of the "ice cream" that's all over Pinterest. You know, the healthy version that's only made out of bananas. Yum yum. I'm feeling pretty content tonight in the little areas. Is there anything you're content with today?!
Instead of dwelling on all the negatives (aka, all the areas I'm failing at being content), let's talk about some victories! In our small group Bible study, we are doing a study called "Better Together" by Rick Warren (author of The Purpose-Driven Life). And this week, he said two things that really stuck with me. He was talking about 1 Corinthians 13 (the "Love" chapter), and it says that love always hopes. And he used an acronym for "hope" that I really liked: "Holding On Praying Expectantly". That's a great way to describe hoping; praying expectantly and holding on when you don't know what's going to happen. Because, really, we never know what's going to happen. No one knows what God is about to do in their life, maybe even tomorrow. So, I am going to hold on a pray expectantly while I'm working on being content.
The other point he made was that loving someone means we rejoice in their victories. And that really hit home with me, because that's something God has been working on in me. You see, one of my best friends just finished building her dream home! And it is GORGEOUS!!! The first time she took me to see it, I was really, really struggling with discontent and jealousy. It didn't matter that she's been married twice as long as I have or that she and her husband have worked really, really hard to be able to build their dream home. These thing didn't matter, because, when that little discontentment bug weasels into your life, details don't matter. Nothing is fair. Period. And it took some time and prayer for me to get over it and be happy for her. But, God helped me past that struggle, and let me tell you, it has been soooooo rewarding to help her move into her new home and really, truly, honestly be insanely excited for her. (And it does help that she's going to let me come over and bake with her in her AWESOME new kitchen!) It has been so freeing and so wonderful to rejoice in her victory. I hope you can find an area in one of your loved ones' lives to do the same.
Also, a small victory for me tonight: Thomas' birthday is on Sunday, and I love trying to spoil him. (I say 'trying' because I'm not very good at it.) But, tonight, after a full day's work, I was not excited to go run around town to get all of his presents and stuff. But, I did, and there's something wonderful about a small accomplishment wrapped up in pretty paper and bows! Yay!!! (Now I just can't wait for Saturday and Sunday when we get to celebrate!!!!!!)

So, now, I'm off to go make some of the "ice cream" that's all over Pinterest. You know, the healthy version that's only made out of bananas. Yum yum. I'm feeling pretty content tonight in the little areas. Is there anything you're content with today?!
Monday, February 18, 2013
Lundi Little Lovelies
For those of you out there who don't speak French, "lundi" is the word for Monday. And well, is it just me, or is Monday a particularly difficult day to be content? I doubt it's just me. Overall, Mondays are not my favorite day. However, that just means I have to work a little harder to be content on this day of the week. So, on Mondays I will be trying to highlight the little lovelies in my life that make me content, even in just a small area of my life. Basically, we're going to use Mondays to look on the bright side, see the glass as half full (or hopefully overflowing), and stop and smell the roses (or cookies, in my case).
So on this lovely lundi, there are a few things that help me feel very contented. The first is my beautiful loom. When I sit at my loom to weave, I just relax. I don't have to think about anything or worry or concentrate too hard; I can just sit and weave and watch a beautiful piece of cloth come together in my hands. It is such a peaceful activity.
 Another thing that makes me feel contented and happy (on most days) is my husband. God gave me such a wonderful man to be stuck with me for the rest of our lives. And all those years I spent praying for a best friend paid off. Because now I have a best friend that will never move away or decide to be better friends with someone else or anything. We are stuck. And I absolutely love it!
Alright, another activity that makes me feel contented is baking. I just love putting a bunch of ingredients in a bowl, mixing it all together, and coming out with something delicious! It's so fun and rewarding. So here's the recipe of the day. These are my favorite, favorite chocolate chip cookies. If you like a big fat cookie, these are for you!

Ingredients:
2 cups all-purpose flour
½ teaspoon baking soda
½ teaspoon salt
¾ cup margarine, melted
1 cup packed brown sugar
½ cup white sugar
1 tablespoon vanilla
1 egg
1 egg yolk
2 cups MILK chocolate chips (you can make these with other chocolate chips but they are NOT as good.)
Directions:
1. Preheat the oven to 325 degrees F. Line cookie sheets with parchment paper.
2. In a medium bowl, mix together the melted butter, brown sugar and white sugar until well-blended. I cut the butter into chunks and melt it in the microwave, alternating microwaving for 15 seconds and stirring everything up. You don't want the butter insanely hot, but you do want it melted.
3. Beat in the vanilla, egg and egg yolk until light and creamy. You almost can't beat this too much.
4. Stir in chocolate chips.
5. Add dry ingredients and stir until just blended.
6. Drop cookie dough onto baking sheets using a ¼ cup measuring cup. Do not fill completely with dough unless you want incredibly enormous cookies. Cookies should be about 3 inches apart.
7. Bake for 15-17 minutes or until the tops just barely start to brown (other parts of the cookie may look a little under done). Cool on baking sheets for a few minutes before transferring to wire racks to cool completely.
8. EAT THEM ALL!!!
Have a good night! Do something that makes you feel content with your life (even some small area of it).
So on this lovely lundi, there are a few things that help me feel very contented. The first is my beautiful loom. When I sit at my loom to weave, I just relax. I don't have to think about anything or worry or concentrate too hard; I can just sit and weave and watch a beautiful piece of cloth come together in my hands. It is such a peaceful activity.

Alright, another activity that makes me feel contented is baking. I just love putting a bunch of ingredients in a bowl, mixing it all together, and coming out with something delicious! It's so fun and rewarding. So here's the recipe of the day. These are my favorite, favorite chocolate chip cookies. If you like a big fat cookie, these are for you!
Coffee House Chocolate Chip Cookies
Adapted from AllRecipes.com
(Photo by dk0504 on allrecipes.com. This photo was one of the things that made me first want to try this recipe over the thousands of others on the internet. If it doesn't make you want to lick your screen, I don't know what will!)

Ingredients:
2 cups all-purpose flour
½ teaspoon baking soda
½ teaspoon salt
¾ cup margarine, melted
1 cup packed brown sugar
½ cup white sugar
1 tablespoon vanilla
1 egg
1 egg yolk
2 cups MILK chocolate chips (you can make these with other chocolate chips but they are NOT as good.)
Directions:
1. Preheat the oven to 325 degrees F. Line cookie sheets with parchment paper.
2. In a medium bowl, mix together the melted butter, brown sugar and white sugar until well-blended. I cut the butter into chunks and melt it in the microwave, alternating microwaving for 15 seconds and stirring everything up. You don't want the butter insanely hot, but you do want it melted.
3. Beat in the vanilla, egg and egg yolk until light and creamy. You almost can't beat this too much.
4. Stir in chocolate chips.
5. Add dry ingredients and stir until just blended.
6. Drop cookie dough onto baking sheets using a ¼ cup measuring cup. Do not fill completely with dough unless you want incredibly enormous cookies. Cookies should be about 3 inches apart.
7. Bake for 15-17 minutes or until the tops just barely start to brown (other parts of the cookie may look a little under done). Cool on baking sheets for a few minutes before transferring to wire racks to cool completely.
8. EAT THEM ALL!!!
Have a good night! Do something that makes you feel content with your life (even some small area of it).
Sunday, February 17, 2013
Like Opening Up a Brand New Book
Mmmm... Can you smell it?! The smell of pages that have never before been leafed through or read? That's a bit what writing the first post on a blog reminds me of. But it's also a bit disconcerting; the first post creates the tone of the entire blog. What type of personality am I going to have here? Goofy, deep, funny, weird, serious... But really, I want this blog to be real. So, I will try to be real with you in this lovely piece of cyberspace. And though you may be reading this and have no idea who I am, I hope that through this blog, you can get to know me. And most of all, I hope you can be blessed in some way by something you may read here.
So... I would like you to get to know me a bit (even if we're already friends, maybe you'll learn something new). So I would like to tell/show you 5 random things about myself that may give you an understanding of some things you'll read about here.

2. I live in Florida with my wonderful husband of 4 1/2 years, Thomas, and my beautiful little kitty, Lo. (It has been a life-long dream of mine to live in Florida, so this is a bit of a dream come true.) And, here's a picture of my lovely darling (taken by my former boss Photography by Carrie).
3. I LOVE baking!!!! You can ask my husband, and he will definitively tell you that I love baking a little (a lot) too much. If it were up to me, I would bake all day, everyday. But we also don't really want to be fat, so I inevitably contain myself. So, you will hear a lot about baking here.
4. I'm a little bit addicted to Pinterest. So, please feel free to follow me. I can't guarantee that everything I pin is a winner, but I'll be trying out tons of recipes and posting about them, so you can see for yourself!
5. And lastly, another of my hobbies that absolutely love is weaving. I have a rigid heddle loom that my wonderful husband and my mother-in-law bought me a few years ago. I love weaving scarves and other projects, so when I have time to weave, you'll certainly hear about that!
So, I think there are enough confessions for one night. Thomas and I had a wonderful new recipe for lunch today, so I'll have to post about that tomorrow!
"Good night dear void." ("You've Got Mail")
Subscribe to:
Posts (Atom)